How to Fix BlueStacks not Working on Windows 10
If you’re a big fan of mobile gaming, you’ve probably heard about BlueStacks, a powerful app player that lets you run Android games and apps on your PC. BlueStacks allows you to play your favorite mobile games on a larger screen, with better visuals and controls. It’s a perfect choice for gamers who want to play on their computer or who want to use their PC’s processing capacity to run high-performance games. BlueStacks, like any program, is not without flaws, and some users may encounter difficulty when using it on Windows 10.
In this article, we’ll look at some of the most common problems that can cause BlueStacks to stop working on Windows 10, as well as potential workarounds to keep your seamless gaming.
ad
Is Your Computer Has the Minimum System Requirements To Run BlueStacks?
Before we get started on the fixes, make sure your PC satisfies the system requirements. You may find out more about them by visiting the BlueStacks official website, which describes the minimum and recommended system requirements.
If your computer does not fulfill these criteria, you will need to upgrade it. However, if it is more powerful than what is required, make the following changes:
1. Restart Your Computer And BlueStacks
ad
It is a process that involves clearing the cache and data of your device and BlueStacks in order to improve their performance and resolve any issues that may be causing them to malfunction.
The cache is a temporary storage area that stores data and files that your device and BlueStacks need to access frequently, such as app data, images, and videos. Over time, this cache can become cluttered and overloaded, leading to slow performance, freezes, and crashes. Clearing the cache of your device and BlueStacks can help to free up memory, speed up the performance of the app player, and improve the overall stability of your device.
Clearing the data of your device and BlueStacks involves wiping out all the stored data and settings of the app player, restoring it to its original state. This can help to fix any issues related to data corruption, software conflicts, or other issues that may be affecting the performance of the app player.
2. Make sure BlueStacks Is Running And Up-to-date
The next step is to confirm that the BlueStacks backend is not experiencing outages. To do so, go to the official website of freshworks.com and check the app’s status as well as any faults recorded there.

3. Turn Of Antivirus On Your Pc
BlueStacks may be viewed as a threat to your system depending on how you configure your antivirus, preventing the software from operating. So, temporarily disable it to avoid the antivirus stopping its execution.
You can also temporarily disable Windows Defender Firewall to confirm that it is not interfering with the app’s execution. If a firewall is causing blame, add BlueStacks to the exclusion list as directed by Microsoft support.
4. Update Graphics Driver On Your System
If BlueStacks is not working properly on your Windows 10 computer, it could be due to an outdated graphics driver. In such a scenario, it is recommended that you update your graphics driver to ensure smooth operation of the app. In case you are unsure of how to update your graphics driver, we have previously provided guidance on how to do it correctly.
| More: Learn how to optimize BlueStacks for better gaming experience
5. Enable Virtualization
When you are facing issues with BlueStacks not working properly on your Windows 10 computer, it may be recommended to enable CPU virtualization to enhance its performance. The method to enable virtualization differs depending on the type of CPU you have. You can refer to a detailed guide provided by BlueStacks support to learn more about the specific steps to enable virtualization for Intel and AMD CPUs.
6. Improve system performance by closing resource-intensive processes running in parallel
Ending high-resource-consuming programs that are running in parallel is a critical strategy for improving your computer’s performance. Multiple resource-intensive apps or processes running concurrently can demand a large amount of system resources, resulting in decreased overall performance and possibly system crashes. You may free up valuable system resources and guarantee that your computer runs efficiently by locating and terminating these processes. This is especially helpful when working with sophisticated apps or running numerous applications at the same time.

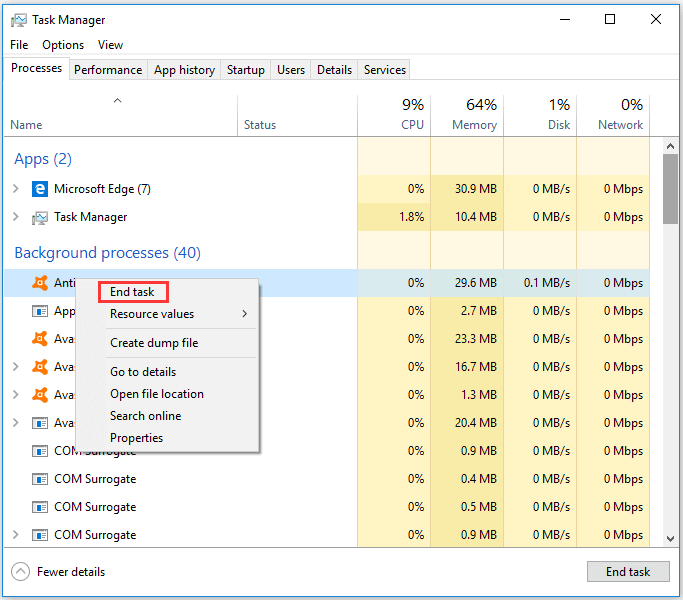
Here are the steps to close end high resource consuming processes running in parallel on Windows 10:
- Press Ctrl + Shift + Esc: This will open the Task Manager.
- Go to the Processes tab: Here you can see a list of all the processes currently running on your computer.
- Sort the processes by the amount of resources they are consuming: Click on the CPU or Memory column to sort the processes by the amount of resources they are using.
- Identify higher resource-consuming processes: Look for processes that are consuming a large amount of CPU or memory resources.
- Select the process: Click on the process to select it.
- Click on End Task: This will terminate the selected process.
- Repeat for other resource-eating processes: Continue to identify and close other resource-consuming processes as necessary.
Note: It’s important to exercise caution when ending processes, as terminating some processes may cause other applications or the system itself to malfunction.
7. Pick The Right Windows Os
An out-of-date operating system might potentially cause app compatibility concerns. As a result, if BlueStacks is updated to the most recent version, Windows must also be completely updated.
Follow these procedures to check for updates:
- Launch the Windows Settings application.
- Navigate to Update & Security.
- In the left sidebar, select Windows Update.
- In the right-hand pane, select Check for updates.
Windows will automatically search for and install the most recent update on your PC. However, if BlueStacks has started acting up after you updated your PC to a newer version, you may wish to roll back the upgrade.
8. Try an SFC scan
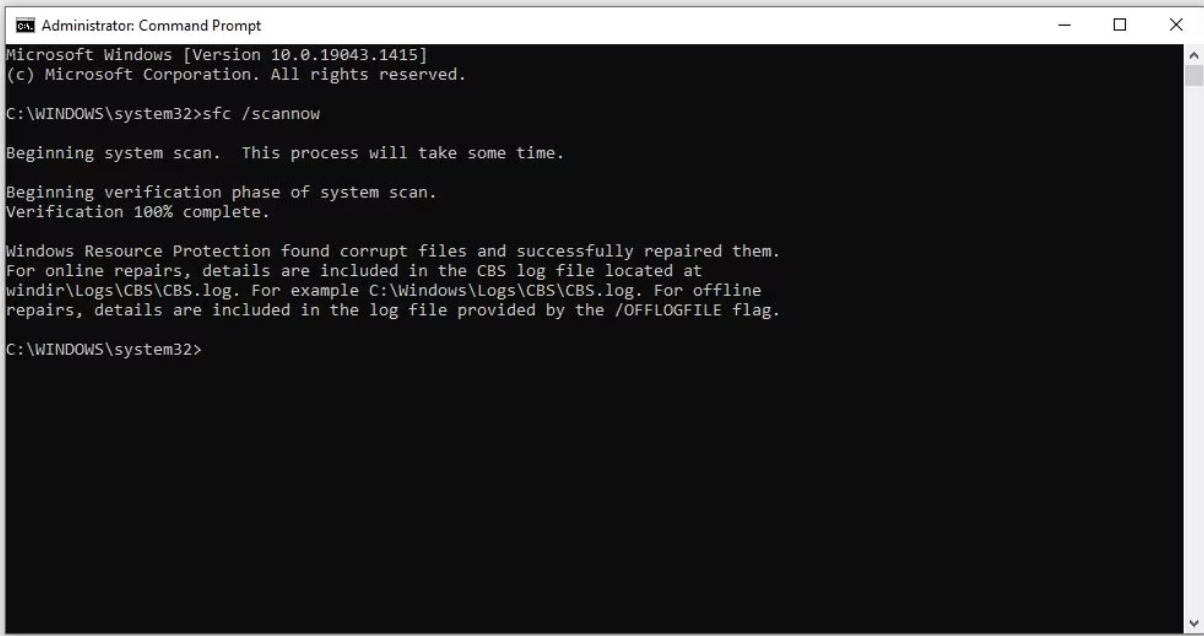
If activating virtualization has no effect, conduct an SFC scan to make sure that no corrupt or damaged Windows files are the root of the problem.
Follow these steps to perform an SFC scan:
- In the Windows search box, enter “cmd”.
- Run as administrator is selected when you right-click on the Command Prompt application.
- Press Enter after typing “SFC /scannow”.
- Complete SFC Scan in Windows Command Prompt

Wait for the scan to finish. After that, follow the onscreen instructions to manually repair the damaged files unless the operating system automatically does it.
9. BlueStacks should be uninstalled and reinstalled.
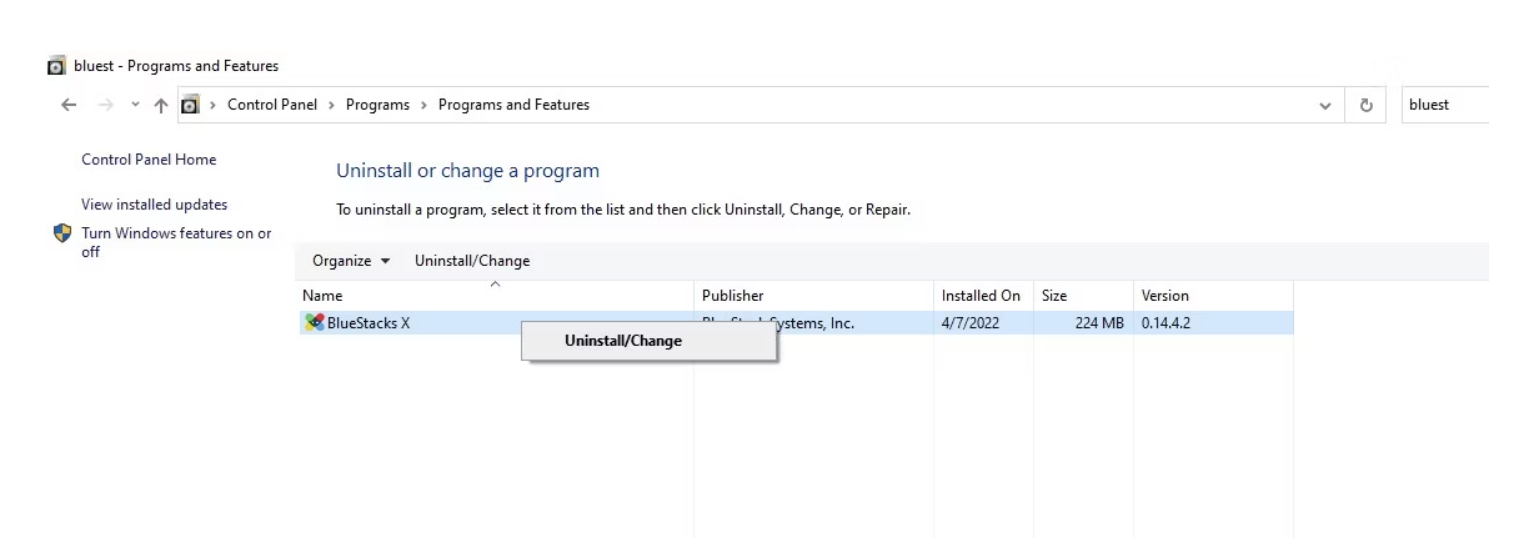
If attempting all of the fixes on the list fails, you should reinstall BlueStacks as a final resort. Before you begin, uninstall the current BlueStacks installation. To accomplish this, take these steps:
- Navigate to the Control Panel in Windows.
- Select Programs > Programs and Features from the menu.
- Uninstall BlueStacks by right-clicking on it.
 Go to the BlueStacks website, download a new copy of the software, then install it after erasing the old version from your computer.
You can hopefully fix the problem you’re having and any hidden problems in the application files with a fresh installation.
Is BlueStacks still having issues? Go for an alternative
The modifications on the list need to aid BlueStacks in getting back on track and enable you to use your preferred programs once more. You might want to think about once resetting your computer if these methods are unsuccessful in fixing the problem.
But if it doesn’t work, it’s preferable to temporarily switch to the BlueStacks alternative. Some of the top BlueStacks substitutes include LDPlayer, NoxPlayer, and Genymotion.


Comments are closed.