
Bluestacks is a popular Android emulator that lets users run Android apps on their computers. Gaming is one of Bluestacks’ most popular use cases, as it provides a larger screen and better controls for mobile games. Users can use Bluestacks to play their favorite mobile games on their PCs without sacrificing the gameplay experience. In this tutorial, we’ll go over how to use Bluestacks to play multiple mobile games or run apps on PC, including how to install and configure the emulator, as well as how to optimize BlueStacks for gaming.

ad
What is multi-instance on BlueStacks?
Bluestacks’ Multi-Instance Manager allows users to run numerous instances of the emulator on their PC. Each Bluestacks instance operates as a separate virtual Android device, allowing users to install and utilize different Android apps on each instance. This functionality is handy for users who need to run many programs at once or who wish to keep personal and work-related apps distinct.
Users may easily create new Bluestacks instances and customize them with different Android versions and settings using Multi-Instance Manager. Each instance is totally independent of the others, which means that any modifications performed in one instance have no effect on the others. By clicking on the “Multi-Instance Manager” icon in the sidebar, users can switch between instances.
Step 1: Download and Install Bluestacks
- Go to the Bluestacks website and click on the “Download Bluestacks” button to download the latest version of the emulator.
- Once the download is complete, run the installer and follow the on-screen instructions to install Bluestacks on your Windows PC.
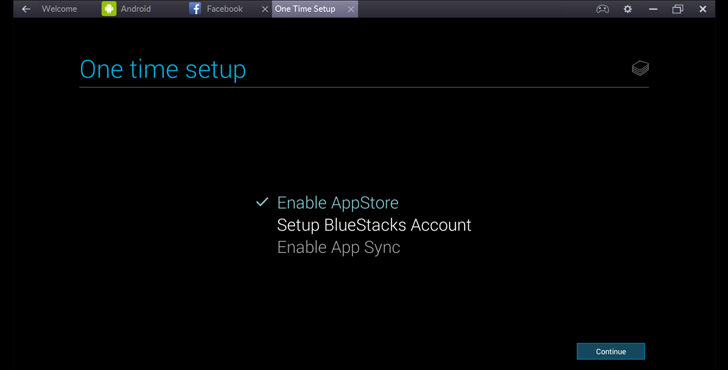
Step 2: Set Up Bluestacks
- Launch Bluestacks and sign in with your Google account.
- Follow the on-screen instructions to set up Bluestacks, including language selection and app syncing.
Step 3: Enable Multi-Instance Manager
- Click on the “Multi-Instance Manager” icon in the sidebar on the left-hand side of the Bluestacks window.
- Click on the “Create” button to create a new instance.
- Follow the on-screen instructions to configure the new instance, including selecting the Android version and setting up Google Play Store.
📚 Also Read:
Step 4: Install Apps on Each Instance
- Open the Google Play Store within each instance and search for the Android app you want to use.
- Once you find the app, click on the “Install” button to download and install it within the instance.

Step 5: Use Multiple Apps
- Once you have installed the apps on each instance, you can switch between instances by clicking on the “Multi-Instance Manager” icon and selecting the instance you want to use.
- You can then launch and use multiple Android apps simultaneously on your PC, each within its own instance of Bluestacks.
That’s it! By following these steps, you can use Bluestacks to run multiple Android apps on your PC, allowing you to manage multiple apps, play games, or use social media apps on a larger screen. The multi-instance feature of Bluestacks makes it easy to switch between apps and manage them in separate instances, without affecting the performance or stability of the emulator.
BlueStacks Multi-instance Manager features
Multi-Instance Manager is a powerful feature in Bluestacks that offers several useful functionalities to users. Here are some of the top features of Multi-Instance Manager on Bluestacks:
- Run Multiple Apps: With Multi-Instance Manager, users can run multiple instances of Bluestacks on their PC, and each instance can run different Android apps simultaneously. This allows users to keep their work and personal apps separate, or to manage multiple apps efficiently.
- Easy Management: Multi-Instance Manager offers a user-friendly interface that makes it easy to create, manage, and switch between different instances of Bluestacks. Users can quickly switch between instances by clicking on the Multi-Instance Manager icon in the sidebar.
- Isolated Instances: Each instance of Bluestacks is completely isolated from the others, which means that any changes made in one instance do not affect the others. This makes it easy for users to keep their apps organized and to avoid conflicts between different apps.
- Customizable Settings: Each instance of Bluestacks can be customized with different Android versions, settings, and preferences. Users can create an instance for a specific purpose, such as gaming, and optimize the settings accordingly.
- Improved Productivity: Multi-Instance Manager can greatly improve productivity for users who need to manage multiple apps simultaneously. It offers an efficient way to switch between apps and to keep them organized, which can save time and effort.
Multi-Instance Manager can greatly enhance productivity and efficiency for users who need to manage multiple Android apps or games on their PC, and is a unique feature that sets Bluestacks apart from other Android emulators.

ad
Comments are closed.