18 Ways to Improve Your Facebook Privacy and Security
Concerned about who has access to what information on Facebook? With billions of users worldwide, Facebook is clearly doing something right by providing a service that has been a part of our everyday life!
Facebook, like other websites, raises security and privacy concerns. However, given the amount of information Facebook collects about its users, it pays to use this app with caution. Many privacy experts would advise deleting the app entirely, but this is simply not an option for many avid users.
In this article I will explain 18 ways to improve your Facebook privacy and security along with other popular social media platforms.
Fortunately, there are steps you can take to make your Facebook experience more private and secure. Facebook has expanded its privacy options, adding areas such as Privacy Checkup and Privacy Shortcuts to make it easier for users to navigate. However, as the number of settings grows, things can become a little perplexing.
With that in mind, here are 18 Facebook security tips to help you protect your privacy and sensitive information.
1. From now on, you can control who can see what’s posted on your timeline
There may be some exceptional circumstances in which you are willing to share your content with people you know as well as complete strangers. However, for the most part, you’ll want to limit who can look you up on Facebook.
Facebook has a setting that allows you to limit who can see your posts. This can be accessed through the Privacy Checkup and Privacy Shortcut sections, but for the purposes of this post, I’ll stick with the standard privacy settings options.
To limit who can see what you post in the future, go to Settings & Privacy > Settings > Privacy.
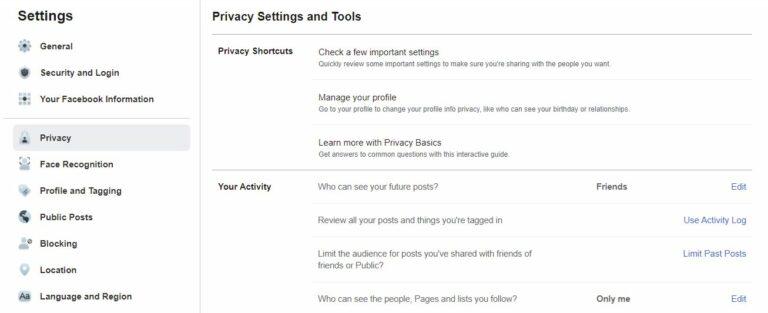
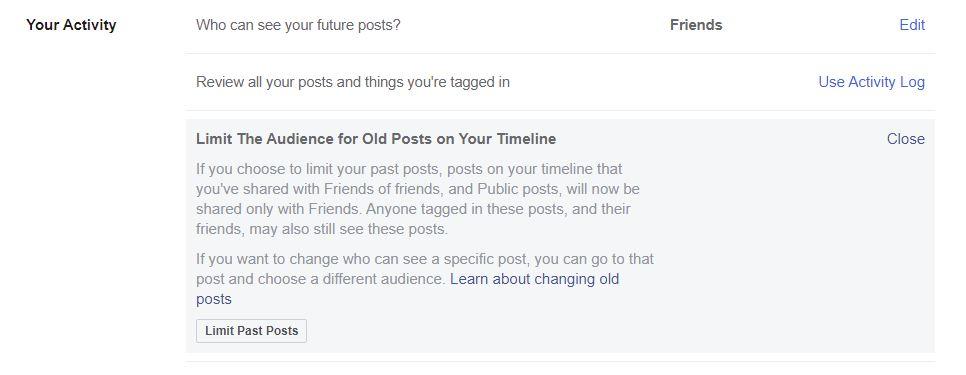
The first option under Your Activity is Who will be able to see your future posts? Next to this, select Edit.
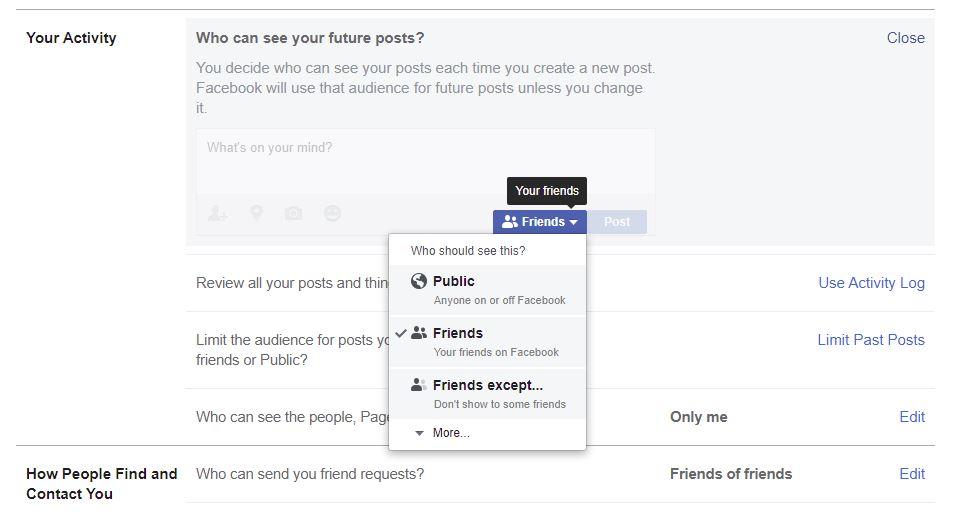
Choose from the following options:
- Public (this means everyone)
- Friends (this is what we would advise)
- Except for friends.. (all of your friends except for any you purposefully omit)
- Particular acquaintances (only those people you choose from your existing list of friends)
- Only me (your timeline will be a little lonely!)
Choose whichever option works best for you—Public should probably be avoided, and only me seems a little pointless—and that setting will be applied to all future posts.
2. Manage who has access to what you’ve previously posted on your timeline
Now that you’ve limited who can see your future Facebook posts, you might want to add a level of control over who can see what came before.
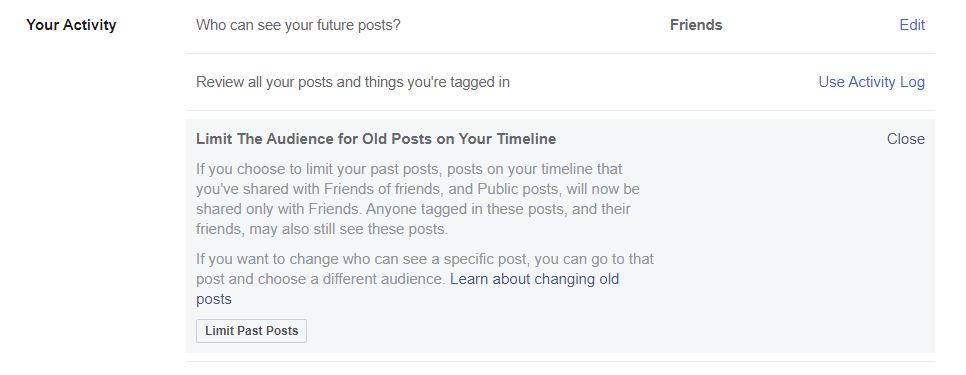
Go to Settings & Privacy > Settings > Privacy, as before. Find the entry for Limit The Audience for Old Posts on Your Timeline under Your Activity and click Limit Past Posts.
A popup will appear explaining the action, and you will need to click Limit Past Posts again to confirm.
3. Prevent others from viewing your friends list, your followers, and the individuals and/or lists you follow.
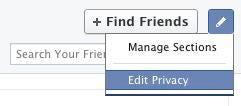 On Facebook, there is a way to block people from seeing who your friends are. You can modify this information by visiting your profile and selecting “Friends” Click the pencil symbol and then Edit Privacy from there.
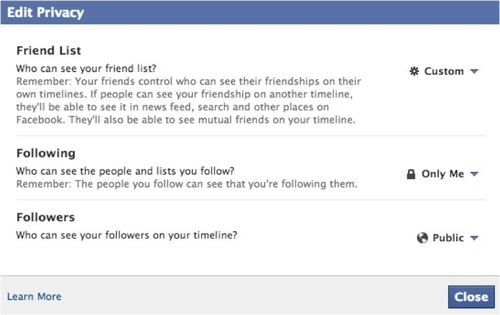
When your privacy settings are accessible, you can determine who can view your friend list. This feature also allows you to control who sees the people/lists you follow and who sees your followers on your timeline:
4. Limited your ‘About’ section

Do you have anything in your About section that you don’t want the whole world to know about? If that is the case, you must take action…
Click the Edit profile button from your profile page.
5. Control who can find you on Facebook
While you’re here, you might want to limit how people can find your Facebook profile based on information they already have about you.
You can still choose whether you want people to be able to look you up using your email address or phone number in the How People Find and Contact You section.

The options are as follows:
- Everyone (most people will want to change this)
- Acquaintances of acquaintances
- Only I have friends.
- Only me
You can also control whether your Facebook profile is found through a search engine query in this section. You may or may not want to change this setting by checking or unchecking the tick box depending on the purpose of your Facebook account (for example, personal or business).

6. Select who can publish on your profile
Attempting to stop people from posting on your timeline. Go to Settings & Privacy > Settings > Profile and Tagging. Under the Viewing and Sharing section, click Edit next to Who can post on your profile? Choose whether you want friends or just you to be able to post on your profile.

Additionally, you can decide here whether you want to allow other users to include your posts in their tales and who may view what they post on your profile.
7. Manage who can contact you via Facebook
Limiting who can see your Facebook timeline will help protect your privacy, but it won’t stop all those strange friend requests and other messages from people you don’t know.
To prevent random people on Facebook from contacting you, change the setting that allows anyone to contact you.
Go to Settings & Privacy > Settings > Privacy and scroll down to the section titled How People Find and Contact You. There are a few choices here, the first of which is Who can send you friend requests?

8. Verify where you’re logged in.
After looking at how to adjust your Facebook privacy settings, it’s time to focus on the security features of the massive social networking platform.
Have you misplaced a device, sold one without checking out of Facebook, or unintentionally left yourself hooked into your Facebook account on a device that your family may access?
If so, you should check which devices are logged in and take action.
On the Security and Login page, look for the Where You’re Logged In section, which may already be displaying one or two devices. Click on See More to see a full list of devices that are logged in.
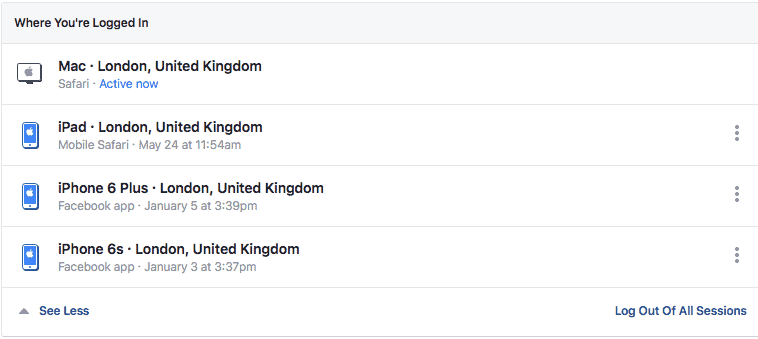
Although you can log out of one or more other devices, you won’t be able to log out of the session you are using right now (in my example, the Mac in the screenshot above).
To log out of a specific session, either pick Log Out Of All Sessions or click the column of three dots next to an entry.
Any devices you don’t recognize here can be reported to Facebook as not being yours, and you will then be guided through the process of securing your account.
9. Block Anonymous Users
Now that you’ve secured your privacy and security, why not block bothersome people, messages, and apps?
To begin, click the arrow in the top right corner of the toolbar and navigate to Settings & Privacy > Blocking.
If you want to stop someone from contacting you or viewing your timeline, you must block them.
To do so, navigate to the Block Users section and enter their name or email address into the box before clicking the Block button.
You can also block a user(s) by visiting their profile page, clicking the three-dot menu icon, and then selecting Block.
Don’t want to completely block someone? Another option is to limit certain users. When you add people to your restricted list, they will only see items that you share with everyone or on the timeline of a mutual friend. They will not see items that you choose to share only with friends. This is a good way to limit what a person can see while avoiding any awkwardness that might occur if you remove them from your friend list. The Blocking page contains the Restricted list section.
10. Modify your password
While we do not advocate changing passwords on a regular basis, there may come a time when you want to change yours anyway, ideally because you have devised a much longer and more complex alternative.
Go to the Security and Login page to do so. Click the Edit button next to Change password under Login.

If you aren’t already using a password manager that auto-fills, you’ll need to re-enter your old password, followed by your new one. Retype the new password and then press the Save Changes button.
11. Block messages
If you don’t want someone to see your timeline but do want them to stop messaging you, then Block messages is the section to use.
Facebook messages are blocked.

Simply type their name into the box to complete your mission.
12. Restrict apps

If you have particular privacy or security concerns about a Facebook-enabled app, you can easily block it.
Enter the name of the offending app in Block apps.
You can also block app invites, event invites, and pages from this Facebook Blocking section, as explained above.
13. How to disable website instant personalization.
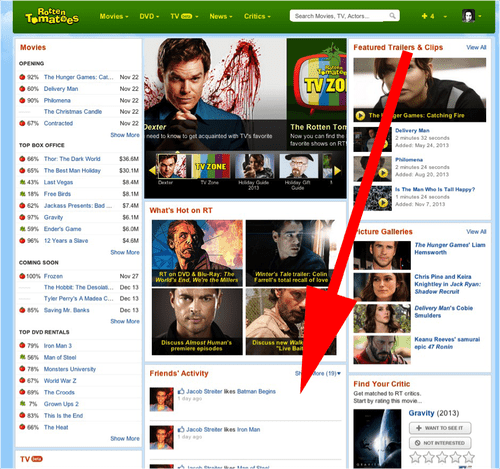
There are websites that use your Facebook account information to provide a tailored experience. These websites retrieve the information you and your Facebook friends have made public. Yelp.com will display local reviews that your Facebook friends have written, whereas RottenTomatoes.com displays movie reviews that your Facebook friends have written:
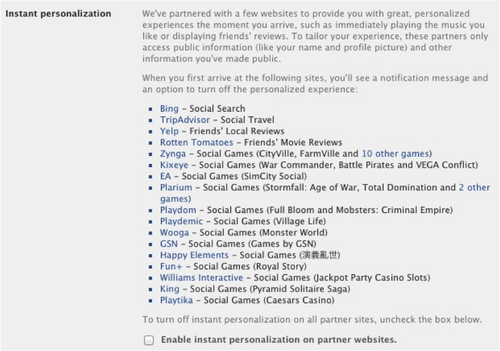
To disable this feature, go to “Account Settings” and then click “Apps.” Remove the checkmark from “Enable instant personalization on partner websites” by scrolling down to the “Instant personalization” section.
14. How to opt out of social advertising.
Facebook can utilize your “Likes” for advertising purposes. If I “like” the Applebee’s Facebook Page, Facebook will be able to display my profile photo along with a tagline that reads “Your buddy Amit likes Applebee’s; visit the Applebee’s Facebook Page to learn about our newest lunch combo.” To prevent Facebook from doing this, navigate to “Ads” in “Account Settings.” Go to the “Ads and Friends” area, click edit, and then pick “No One” where it says “Pair my social activity with advertisements for.”
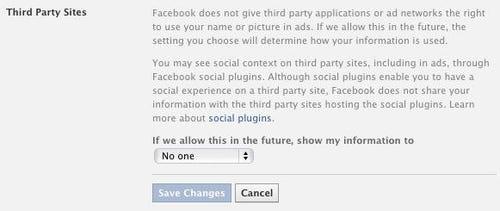
Facebook does not currently allow third party applications or ad networks to utilize your name or image in advertisements, but this may change in the future. You can now opt out of this however. Change your options in the “Ads” section of “Account Settings” where it states “If we allow this in the future, show my information to” under “Third Party Sites” to “No one.”
15. Manage un-authorized login notifications
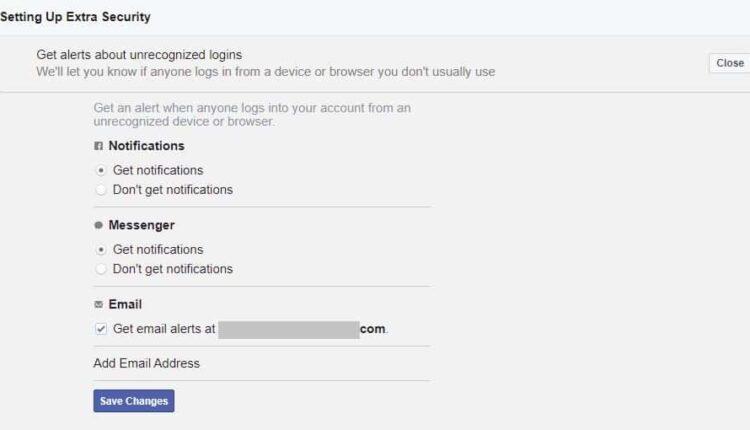
Another critical issue to address is unrecognized login notifications. From the main page, select Settings & Privacy by clicking the drop-down arrow in the top right corner of the toolbar. Go to Security and Login > Settings.
Get alerts about unrecognized logins is an option under Setting Up Extra Security. When you click Edit, you can specify whether you want to be notified whenever an unknown computer or other device tries to access your Facebook or Messenger account. You can have notifications sent to the email address Facebook has on file for you, or you can add another email address.
Just below this section, you can also add three to five trusted contacts who can assist you if you get locked out. Facebook will send them a code and a URL to assist you in logging back in. While this may appear to be a good idea, from a security standpoint, it is preferable if you are the only person who has access to your account.
16. Enable two-factor authentication
Until a foolproof biometric substitute is developed, the password is here to stay, which isn’t a great option these days. We’ve previously discussed how to create strong passwords and the benefits of password managers, but the truth is that most people still use fairly weak credentials.
For the time being, the best solution to that problem is two-factor authentication (2FA), which you should enable on your Facebook account right away.
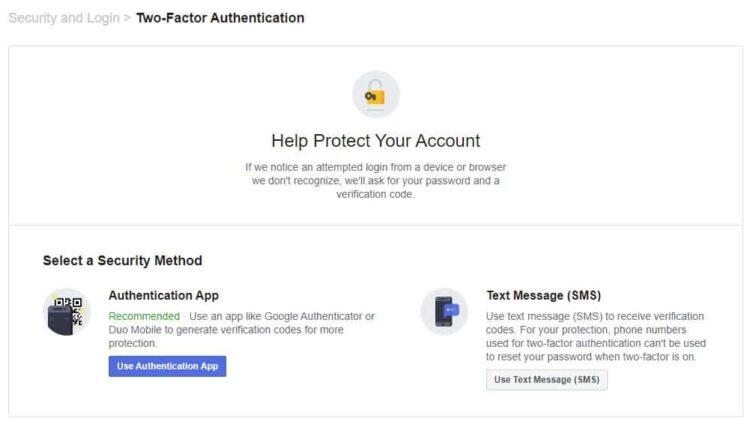
To do so, navigate to the Security and Login page and look for the section on Two-Factor Authentication. Click Edit next to Use two-factor authentication.
You will be given two options for 2FA here: sending a text message or using an authentication app like Google Authenticator or Duo Mobile.
Within the Two-Factor Authentication section, you can exclude specific devices (for example, your home desktop) from requiring 2FA.
17.Encrypted notification emails
ad
If you are particularly concerned about security, you may have already obtained a PGP public key in order to send and receive encrypted communications. Our tutorial will teach you how to set up PGP encrypted email.
If that’s the case, Facebook lets you enter that key to encrypt your notification emails as well.
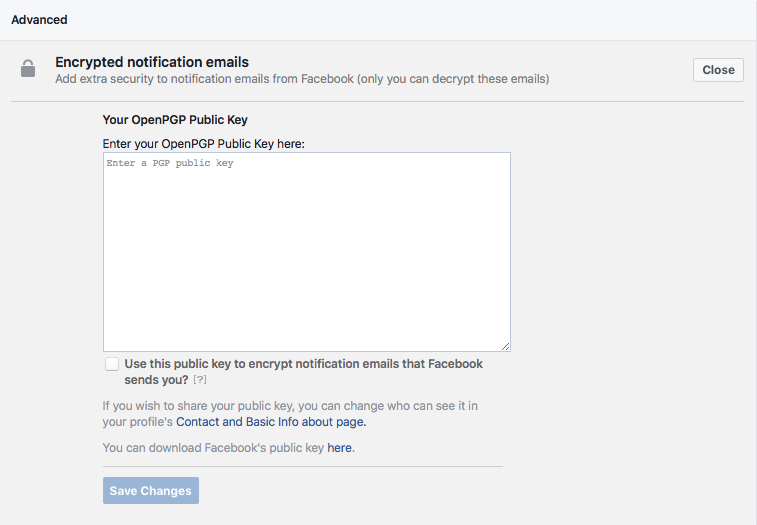
After entering your key, check the box and then save your changes, keeping in mind whether you want to share your public key (you can adjust this setting in the Contact and Basic Info page).
ad
18. Beware of Facebook frauds
Now that your Facebook account is secure, you must also evaluate the messages you get and the content you view on other users’ timelines.
Keep in mind that bad actors are constantly looking for ways to deceive their victims. This is typically something harmless, such as persuading you to like a ludicrous post – celebrity death hoaxes are common on Facebook — or responding to a message containing fake news.
Typically, such situations do not constitute a genuine threat, but they can be extremely aggravating, saddening, or simply bothersome, which is a good reason to use the blocking settings!
However, some Facebook messages constitute a serious threat.
Similar to your email account, malicious actors can send malware links and phishing messages over Facebook. It is typical for hackers to hijack Facebook accounts and send these messages to all of the victim’s friends.
As always, if a link appears suspect, do not click on it, and keep in mind that if anything appears too good to be true, it generally is.
Our Thoughts
Facebook is constantly modifying its operations in an effort to safeguard its users, so keep in mind that the aforementioned may change over time. If any updated and new facebook privacy and security feature becomes available, or if you believe we missed something, please let everyone know in the section below.
ad


Comments are closed.