How To Speed Up BlueStack Android Emulator On Windows PC
BlueStacks is one of the most popular Android emulators. It allows you to play Android games and apps on your computer/PC. It is a slightly heavy application for PC as it requires the PC to have at least 2GB or more RAM for running applications smoothly. By default, BlueStacks uses 768 MB RAM, which sometimes is not enough to run it smoothly. This problem can be easily solved by increasing the size of RAM in this emulator. You can install and run the Smart System App to check the RAM size of the BlueStacks. This tutorial shows you How to speed up Bluestacks Emulator to run fast on your PC.

ad
Follow the step to speed up Bluestack Emulator
1. Update BlueStacks
BlueStacks 4 is the fastest version of the emulator. As such, games will probably be somewhat faster and more responsive in the latest BlueStacks than previous versions. So updating to the latest BS 4 is the first thing users utilizing older versions of the software should do.
Those users with BlueStacks version 3.56.76.1867 or higher can update the emulator without losing game data and in-app purchases by clicking the Download BlueStacks. However, those users utilizing an older BS version less than 3.7.44.1625 cannot directly update the software. Thus, some users might need to uninstall BlueStacks and then download and install the latest BS 4 from the emulator’s website.
ad
2. Allocate More RAM to BlueStacks
RAM is a crucial system resource that BlueStacks needs at least two gigabytes of. Allocating more RAM to BlueStacks will probably reduce game lag to ensure faster gameplay. More recent BS versions include game engine settings with which users can maximize the amount of RAM, and other system resources, for the Android emulator. Follow the guidelines below to increase RAM for BlueStacks.
- Open the BlueStacks emulator.
- Click the Settings button at the top right of BlueStacks to open a menu.
- Select Settings to open a window that includes further options for the software.
- Click the Engine tab on the left of the Settings window.
- Then users can drag the Memory bar to the right to increase the amount of RAM allocated to BlueStacks. Drag the bar to the far right to increase RAM to 4096 MB (approximately four GB) if your laptop or desktop has eight GB RAM or more.
- Users can also select more CPU cores for BlueStacks. Select the highest number from the CPU Cores drop-down menu.
3. Close Third-Party Software
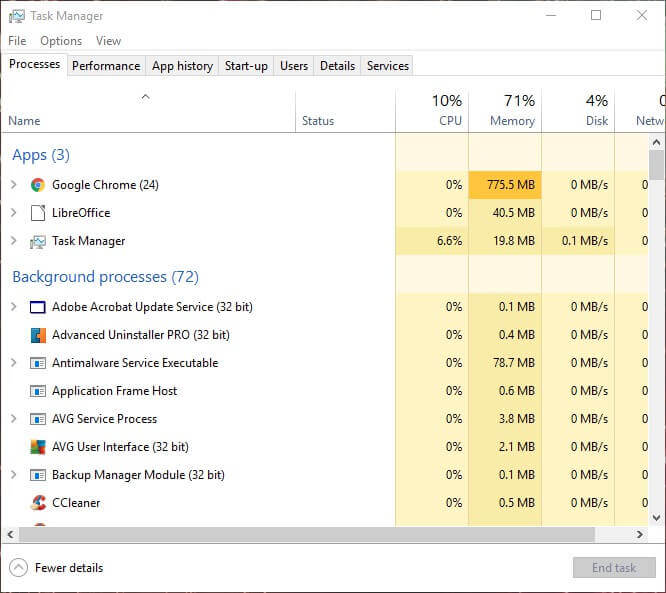
- Right-click the taskbar to open its context menu, and select the Task Manager option.
- Then click the Processes tab shown directly below.
![Task Manager]()
- Select software (except BlueStacks) listed under apps, and press the End task button.
- Background processes also include some background software. So have a look for and close any non-essential third-party software listed there.
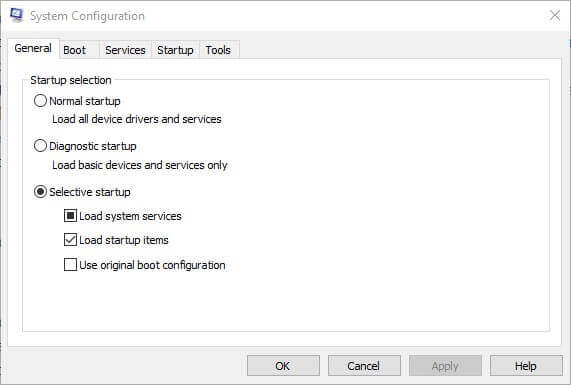
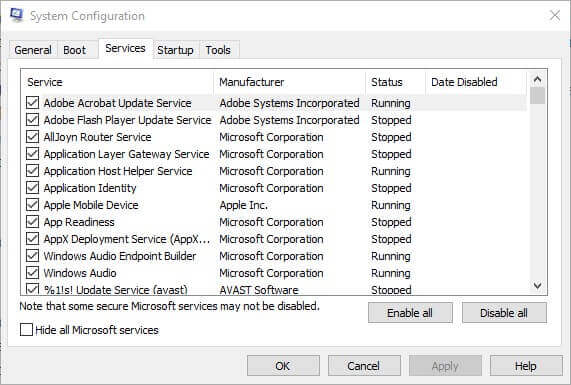
Note that third-party software services can also hog system resources. Users can disable third-party services with the System Configuration utility. This is how users can stop software services.
- Press the Windows key + R keyboard shortcut.
- Enter ‘msconfig’ in Run, and click the OK button.

- Select the Services tab on the System Configuration window.
![System Configuration Services]()
- Select the Hide all Microsoft services option.
- Then deselect some of the third-party services listed.
- Click the Apply and OK buttons.
- Select the Restart option to restart Windows.
Run a PC Scan with Restore Repair Tool to find errors causing security problems and slowdowns. After the scan is complete, the repair process will replace damaged files with fresh Windows files and components.
4. Turn Off Antivirus Utilities
Third-party antivirus software features can also have a notable impact on the performance, or speed, of BlueStacks’ Android games. So temporarily turning those features off, by disabling the antivirus packages, might speed up BlueStacks.
Users can temporarily turn off some antivirus software by right-clicking their system tray icons and select a disable or turn off the option. Failing that, users can select a disable option on the settings tab in the antivirus utility’s primary window.
Some antivirus software incorporates hardware-assisted virtualization, which can have a notable impact on the BlueStacks emulator. Temporarily turning the antivirus software off, as outlined above, might also disable hardware-assisted virtualization.
Software such as Avast and AVG Antivirus Free also include hardware-assisted virtualization settings that users can deselect on the Troubleshooting tabs within those utilities. So deselect the Enable hardware-assisted virtualization option if there is one within your antivirus software.
5. Adjust BlueStacks’ Display Settings
Display settings usually have a big impact on gameplay speed for Windows games. Adjusting the graphical settings to lower the resolution and DPI often speeds up games as that frees up system resources. As such, adjusting the resolution and DPI in the same way might also speed up Android games played with the BlueStacks emulator. BlueStacks users can adjust display settings as follows.
- Click the Settings button in BlueStacks to open a menu.
- Select Settings on the menu to open a Settings window.
- Then click the Display tab if it’s not already selected.
- Select a lower resolution setting. For example, users could select to reduce the software’s resolution from 1,920 x 1,080 to 1,600 x 900.
- In addition, select the Low (1600DPI) option on the Display tab.
6. Update the Graphics Card Driver
The latest graphics card drivers can notably enhance Windows gaming. Of course, that is primarily in respect of visual quality; but new graphics card drivers can also optimize gaming in other ways. Windows Update will automatically update graphics card drivers if configured to do so. However, Windows Update doesn’t always keep up with the very latest graphics card driver updates. So it might be worth checking if there’s a more updated driver for your video card.
Click Free Download on the Driver Booster to add the software to Windows 10. It automatically scans and tells users what device drivers need to update when launched. Then users can press the Update Now button.

Those are a few resolutions that might reduce gameplay lag for games played in BlueStacks. Then the emulator’s Android games will feel somewhat faster than before.
ad


Comments are closed.