
For many new Apple users, especially those transitioning from Windows and accustomed to the Prt Scrn (Print Screen) button, understanding how to screenshot on Mac may not be immediately apparent.
The process of Mac screen capture, despite requiring just a few key presses, has historically lacked intuitiveness. This is evident in the differentiation between key commands for capturing entire windows or specific selections, as well as the limited option to record screen videos solely through QuickTime Player.
ad
In this comprehensive guide, we will delve into the intricacies of taking screenshots and capturing videos on Mac, while also introducing handy tools that can enhance your Apple screenshotting experience. Discover the best methods and utilities to streamline your Mac screenshot workflow and make the most out of your Apple device.
More: Screenhunter – Windows screenshot tool
Mac Screenshot Shortcuts
Every Mac computer has the capacity to capture high-quality screenshots, which you can easily edit and share according to your preferences. Whether you want to capture the full screen, a specific window, or an section of it, Mac provides a variety of possibilities. You will mostly need the Shift, Command, and number keys to begin any Mac screenshotting technique.
ad
- To capture a screenshot of your entire Mac screen, simply press and hold Shift + Command + 3.
- For more precise capturing of a specific portion, use Shift + Command + 4, which transforms your cursor into a crosshair. Click and drag to select the desired area, and release the mouse to capture the screenshot.
- When it comes to capturing specific Mac windows, utilize the key combination Shift + Command + 4, followed by pressing the Spacebar. Your cursor’s crosshair will then be replaced with a camera icon. To take a screenshot of a highlighted window, click on it with your cursor. This method allows you to effortlessly capture specific windows on your Mac.
Apple’s built-in snapshot tool, on the other hand, only provides five options for capturing your Mac’s screen. Continue reading to learn about the multitude of additional options available through third-party applications. Let’s explore and discover the screenshot solution that best suits your needs.
Best Screenshot App for Your Mac
If you’re looking for a snipping tool for Mac that can do a little more, such as taking a scrolling capture, you’re aware that the native tool can’t. As a result, you need help of a third-party developer. CleanShot X is unbeatable in this category. The app is customized for over 50+ different changes, making it the ultimate screen capture tool for Mac. CleanShot X can capture a window, a full screen, an area, or even scrolling content, as well as record video and GIFs. You can select to hide all desktop clutter and disable desktop notifications while capturing anything on your desktop.
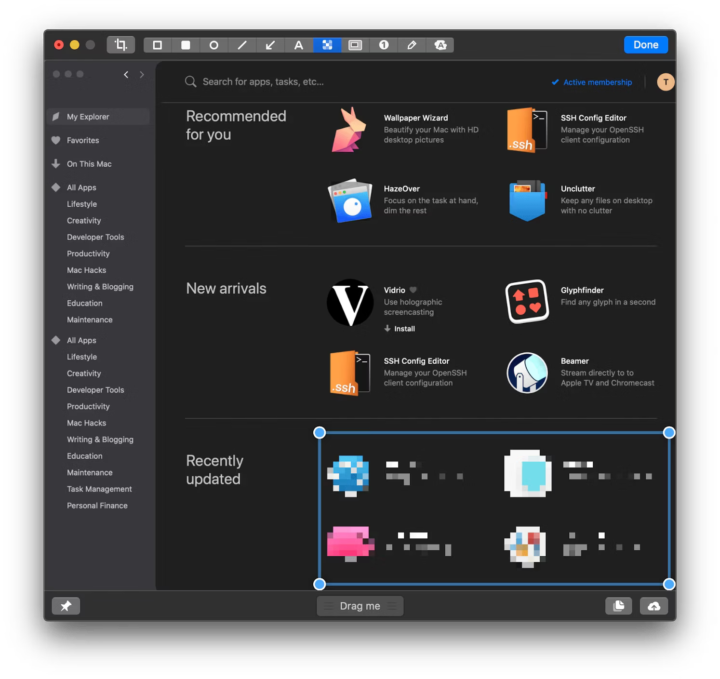
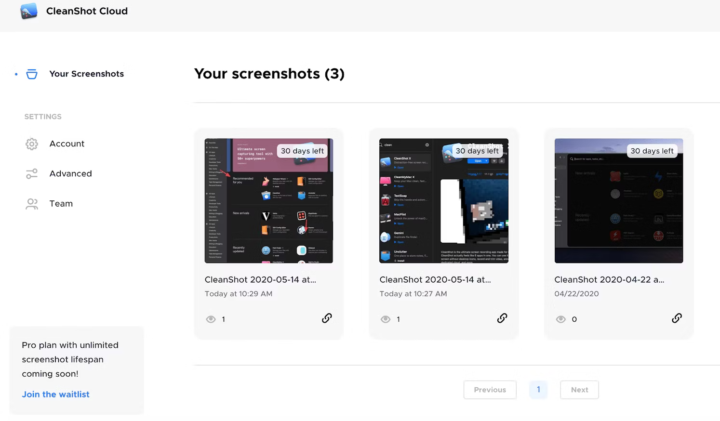
The self-timer, screenshot pinning, and internal cloud functionality are among the lesser-known yet remarkable features worth highlighting. CleanShot X, for example, has a self-timer option that allows you to snap screenshots with a delay at the perfect moment. You may also pin your screenshots to your desktop, making them immediately accessible and visible. Finally, CleanShot X allows you to save your screen captures to the internal CleanShot Cloud, allowing for easy sharing via simply generated shareable links.
Screenshot on Mac with the Screenshot Menu
There are two ways to capture screenshots on your Mac starting with macOS Mojave and subsequent versions. You can use the screenshot menu to choose your preferred capturing method, or you can use dedicated keyboard keys for actions such as capturing a window or a specific area. However, older macOS versions lack the screenshot menu but still have commands to capture either a portion or the complete screen. Capturing screenshots on your Mac is possible regardless of whether you like the simplicity of the screenshot menu or the efficiency of keyboard shortcuts.
There is an easy keyboard shortcut to open a screen capture menu for users of Mojave, Catalina, Big Sur, or Monterey. Simply press Command + Shift + 5 to open a menu with the following options:
- Capture the Entire Screen
- Capture Selected Window(s)
- Capture Selected Portion
- Record the Entire Screen
- Record Selected Portion

The Options button, located on the right-hand side of the screen capture menu, provides multiple functionality, including the ability to specify the destination folder for saving your MacBook screenshots and videos. By upgrading to Mojave, you may greatly simplify the screenshotting process and find an easy solution to the frequently asked question, “how do I take a screenshot on my Mac?” Utilize Mojave’s streamlined features and more flexibility to optimize your screenshot workflow.
Print Screen of a Selected Area
Let’s revisit the topic of shortcuts and delve into the details of capturing a screenshot of a specific area on your Mac. Here’s a step-by-step guide:
- Press and hold the Shift, Command, and 4 keys simultaneously.
- A crosshair cursor will appear, allowing you to select the desired portion of the screen to capture. Drag the crosshair accordingly. If you need to adjust the selected area, press and hold the Space bar while dragging to reposition the selection. To cancel the screenshot, simply press the Esc (Escape) key.
- Release the mouse or trackpad button to capture the screenshot.
- After capturing, a thumbnail of the screenshot may appear in the corner of your screen. You can click on it to make edits if necessary. Alternatively, you can wait for the screenshot to be automatically saved to your desktop.

Capture a Screenshot of The Entire Screen
To capture a screenshot on your Mac, simply follow these steps:
- Press and hold Shift, Command, and 3 keys simultaneously.
- The screenshot will be automatically taken and saved to your desktop.
- If a thumbnail of the screenshot appears in the corner of your screen, you can click on it to access editing options. Alternatively, you can wait for the screenshot to save directly to your desktop.
How to Screenshot a Specific Section or Window on Mac
To capture a specific window or menu on your Mac, follow these steps:
- Open the window or menu that you wish to capture.
- Press and hold Shift, Command, 4, and the Space bar simultaneously.
- As a result, the cursor will transform into a camera icon, indicating that you are in window/menu capture mode.
- If, for any reason, you decide to cancel the screenshot, simply press the Esc (Escape) key.
📚 Also Read: How to fix it when left click on Mac is not working
How to Take Screenshots Using the Touch Bar
If you’re having trouble adjusting to the absence of a Windows-style print screen button on your Mac, don’t worry! If your Mac has a Touch Bar, you can add a dedicated button for capturing screenshots. Here’s how it’s done:
- Go to Apple menu > System Preferences > Keyboard
- Click Customize Control Strip
- Choose the location of your screenshot button on the Touch Bar, drag and drop it there, and save the changes.
Taking screenshots is a breeze now that you’ve added the screenshot button to your Touch Bar. Simply click the snapshot button to bring up a screen capture option. If you want to change the default save location for your screenshots, you can use the “Save To” button. Then, choose whether you want to capture the full screen, a specified area, or a window. To take a screenshot, move the cursor to the target area and click.
Third-Party MacOS Screenshot Apps
Capto is another recommended alternative for comprehensive screen recording capabilities, in addition to the previously mentioned CleanShot X. Capto offers a variety of options if you’re looking for a solution that focuses on screen recording. Capto, in addition to video recording and snapshot capture on Mac, has a user-friendly interface reminiscent of iMovie, allowing you to easily annotate and modify what you capture. With Capto, you can improve your screen recording experience while also enjoying straightforward editing features to enhance your captured content.
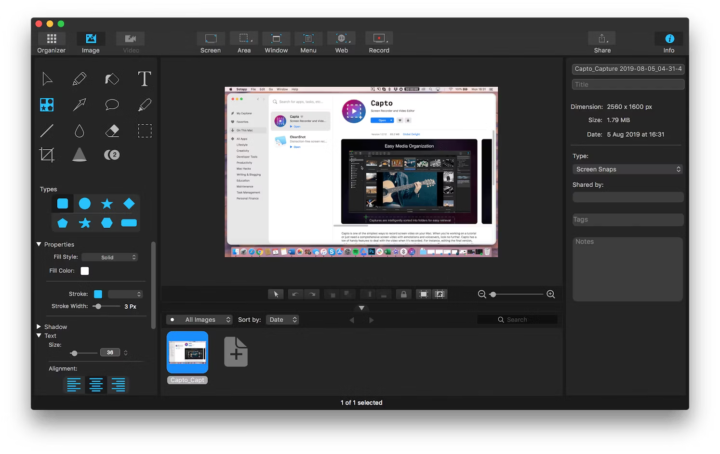
Capto is an excellent tool for creating video tutorials and effortlessly sharing them across multiple platforms. Its strong visual capabilities make it suitable for people who prefer captions over voiceovers, as well as those who are aural timid. Furthermore, Capto has an organizer that aids in the efficient management and organization of your screenshots, providing simple access and retrieval. Capto allows you to easily produce engaging video tutorials, add captions, and benefit from its organizing features, which simplify the screenshot management process.
Yac is the perfect application if you want to share information with your coworkers without having to make irritating phone conversations. With its asynchronous audio and video messaging application, Yac offers an alternate method in the present world of excessive virtual meetings. Yac, which is used by thousands of remote employees worldwide, enables you to rapidly converse and share crucial information with your colleagues at your convenience. Say goodbye to interruptions and explore Yac’s seamless experience for efficient and successful cooperation.
With Yac, you may record a brief voice message, complete with screen recording and notes, and even add your webcam if wanted. The beauty of Yac is its asynchronous nature, which allows your coworkers to read your message at their leisure. Additionally, Yac can be smoothly connected with Slack, ensuring that you receive notifications whenever someone gives you a yac. This integration improves communication efficiency and keeps you linked to your team even while working remotely or on different schedules. Take use of Yac’s flexibility to streamline your collaborative efforts.

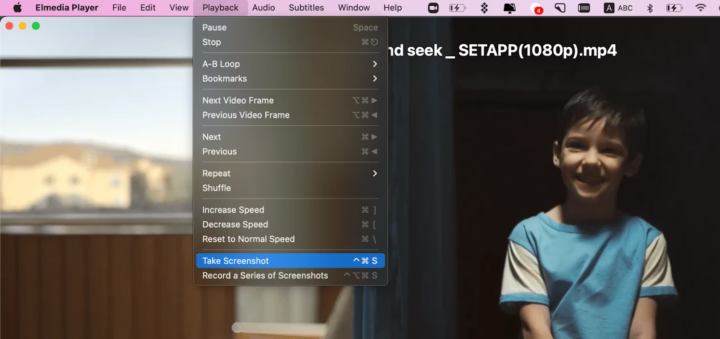
Advanced media players provide a screenshot function for recording specific moments in movies or videos. This function is especially useful when watching movies online, as many streaming service providers ban traditional screenshot tools. However, by using Elmedia Player, you may avoid the limitation and easily capture screenshots while playing any media source. Elmedia Player enables you to capture screenshots on the fly, allowing you to easily save those memorable frames. Elmedia Player enhances your media viewing experience by expanding your screenshot possibilities.
How to Print Screen on Mac with Preview
Preview, Apple’s primary image and PDF a viewer, is most certainly an essential element of your workflow. You can capture particular areas of the screen, windows, or even the full screen with the built-in screenshot tool in Preview. One benefit of utilizing the screenshot tool in Preview is that it opens the taken screenshot in a new Preview window. This allows you to easily change the screenshot by resizing it, adding notes, and making other changes.
 Taking a screenshot on your Mac using Preview is a straightforward process. Here’s how:
- Open the Preview application.
- In the app menu, navigate to File > Take Screenshot.
- From the options provided, choose the specific part of the screen you wish to capture.
- Once you’ve selected the desired area, click to take the screenshot.
- The captured screenshot will then appear in a new Preview window, allowing you to edit and make modifications as needed.
- After editing, you can save the screenshot to any location on your Mac by selecting File > Save or using the appropriate keyboard shortcut.
MacOS Screenshot Organization
If you frequently capture screenshots, your Downloads folder or Desktop may become clogged with generic image titles like “Screen Shot 2023-XX-XX at 21.36.15.” Unfortunately, these abbreviated filenames might make it difficult to keep track of and manage your images effectively.
While using Finder with Preview allows you to examine all of your screenshots, it may not be the most visually appealing experience. PhotoBulk, a powerful bulk image editor specifically built for renaming, resizing, and compressing images in large quantities, is a perfect answer for this. Simply drag and drop the screenshots you wish to rename into PhotoBulk, enter a name for the group, and start the process by clicking “Start.” As a result, each renamed image will be properly placed within its own assigned folder, ensuring a more organized and effective workflow.
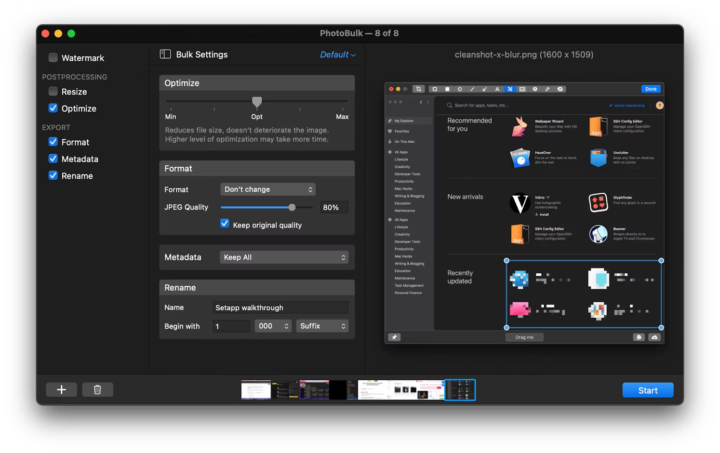
Pro tip: You can specify the particular format of your image names as well as the exact number from which the count starts.
How to Share Apple Screenshots
After finding out how to take screenshots on your Mac, the next challenge may be sharing those screenshots with coworkers or friends. Emailing items back and forth or publishing them to a public Google Drive can be inconvenient and time-consuming. A straightforward tool like Dropshare can be extremely helpful in streamlining this procedure. Dropshare, as the name implies, simplifies the sharing of screenshots (and other data) by allowing you to just drop them into the selected location.
Dropshare integrates flawlessly with a variety of popular third-party cloud applications, allowing you to easily connect and share screenshots. If you prefer to keep your Mac screen capture sharing separate from your other sharing activities, you can use Dropshare Cloud, a proprietary solution provided by Dropshare.

FAQ’S
How to View Screenshot on Mac?
When you capture a screenshot on your Mac, it is stored to the Desktop for convenient access. To examine your collected screenshots, go to your computer’s Desktop screen or use Finder to access the Desktop folder and browse through your saved pictures. If you have a lot of screenshots on your desktop, you can use the Finder to get rid of them. Finder displays the date and time that each screenshot was taken, making it easy to search for and identify specific grabs.
How to Paste a Screenshot on a Mac?
If you don’t want to save your screenshots to the Desktop or any other location, you can copy them directly to the Mac clipboard. This enables you to easily paste screenshots into documents or online forms without requiring intermediate storage. This feature is very beneficial when you need the screenshot right away and don’t want to store it for future reference.
To copy a screenshot to the clipboard on a Mac, simply hold down the Control key while taking the screenshot. Once copied, navigate to another application or document and use the Command + V keyboard shortcut to paste the screenshot. This seamless process provides a quick transfer of the screenshot from the clipboard to your selected destination, saving you time and effort in the a screenshot workflow.
How to Disable Screenshots on Mac?
To disable screenshots on your Mac, follow these steps:
- Go to System Preferences by clicking on the Apple menu in the top-left corner of the screen and selecting “System Preferences.”
- In the System Preferences window, click on “Security & Privacy.”
- Select the “Privacy” tab.
- From the left sidebar, click on “Screen Recording.”
- You will see a list of applications that currently have access to record your screen. To make changes, click on the padlock icon in the bottom-left corner of the window and enter your password to unlock it.
- To disable screenshots for specific applications, uncheck the corresponding checkboxes next to their names. If you want to re-enable screenshot access for an application, check the box again.
How to Selectively Screenshot on Mac?
To capture a rectangular area for a screenshot on your Mac, follow these steps:
- Press and hold the Command + Shift + 4 keys simultaneously on your keyboard.
- As you do this, your cursor will transform into a small reticule in the lower-left corner, displaying pixel coordinates.
- Click and hold the mouse button or trackpad button, and then drag the reticule to select the desired rectangular area for your screenshot.
- If you want to cancel the screenshot without capturing the picture, simply press the Esc (Escape) key on your keyboard.
- Once you have positioned the reticule over the desired area, release the mouse button or trackpad button to capture the picture.
Conclusion
Mastering the art of screenshotting on a Mac is a valuable skill that may boost your productivity and communication. Throughout this ultimate guide, we’ve looked at numerous methods and tools for capturing screenshots on your Mac, whether it’s the entire screen, specific windows, or specific parts. The possibilities are endless, from using built-in shortcuts to leveraging third-party tools like CleanShot X, Capto, and Preview. We’ve also discussed the significance of effective screenshot management, such as easily organizing and sharing your captures.
ad
Comments are closed.