How to Close Ads on Bluestacks
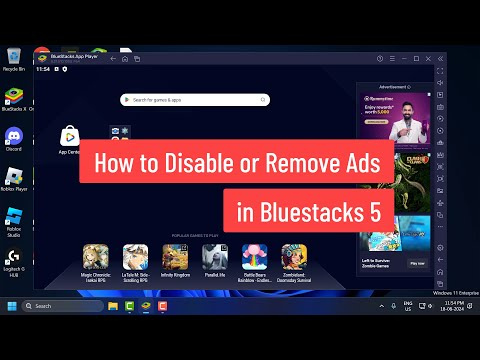
BlueStacks is one of the most popular Android emulators, allowing users to run Android apps and games on their Windows or Mac PCs. While BlueStacks is highly praised for its functionality and versatility, it comes with ads that can be intrusive to the user experience. Fortunately, there are ways to disable or minimize these ads. In this guide, we’ll walk you through different methods to disable ads in BlueStacks.
ad
Why Are Ads Shown in BlueStacks?
BlueStacks is a free emulator, and ads are one of the ways they generate revenue to support its development. Ads usually appear in the form of pop-ups, banners, or notification alerts within the app or while navigating through the BlueStacks interface.
Though ads are a common source of revenue, they can disrupt gameplay or app usage. Users often seek ways to turn them off for a smoother experience.
Methods to Disable Ads in BlueStacks
ad
There are a few methods you can use to minimize or completely disable ads in BlueStacks. These methods range from simple in-app settings to advanced system adjustments. Here are the best approaches:
1. Enable the “Ad-Free” Option in BlueStacks Settings
BlueStacks offers a way to remove ads through its internal settings. Here’s how you can do it:
- Open BlueStacks: Launch BlueStacks on your PC or Mac.
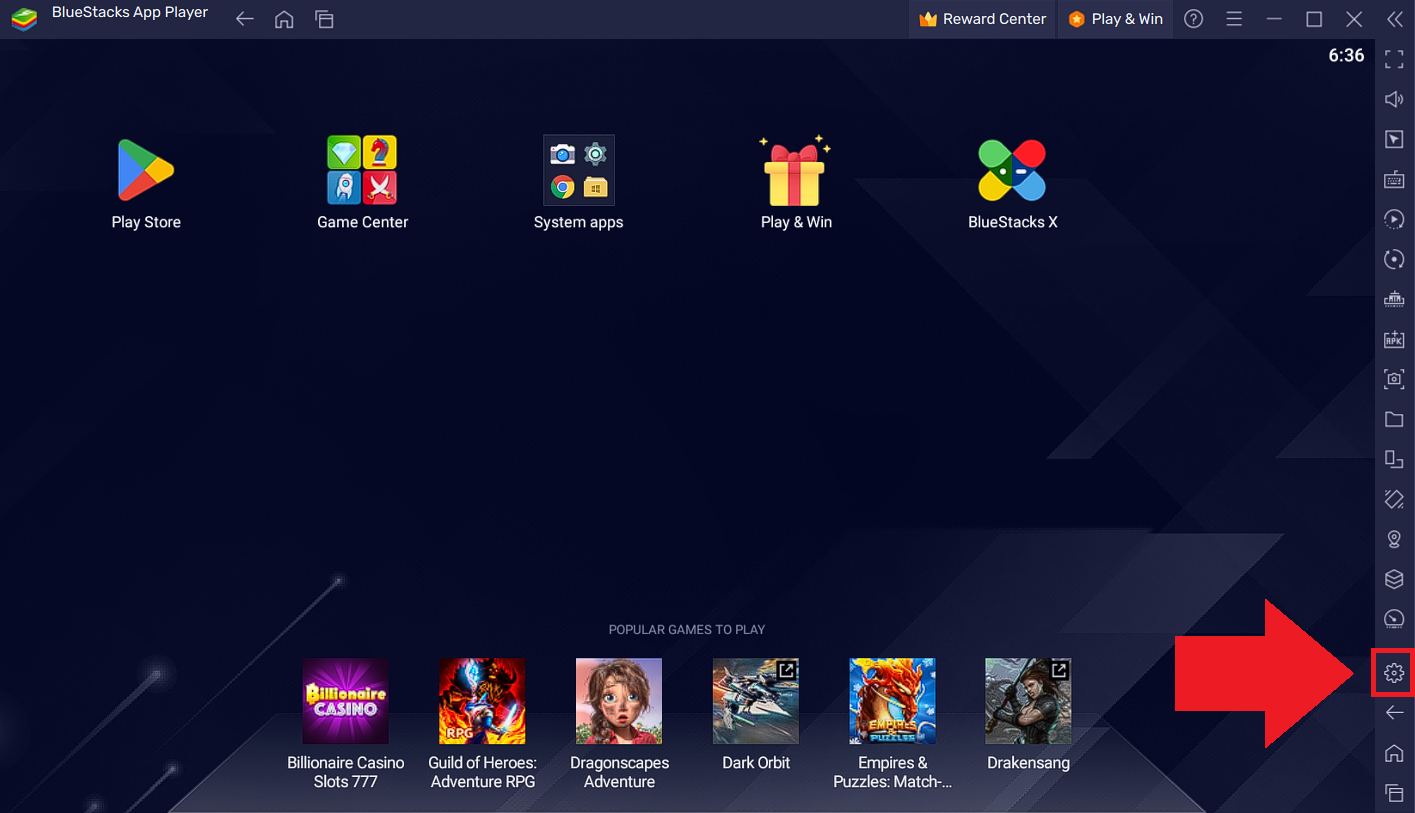
- Go to Settings: In the top-right corner of the BlueStacks window, click the gear icon to open the settings menu.
![Go to Settings]()
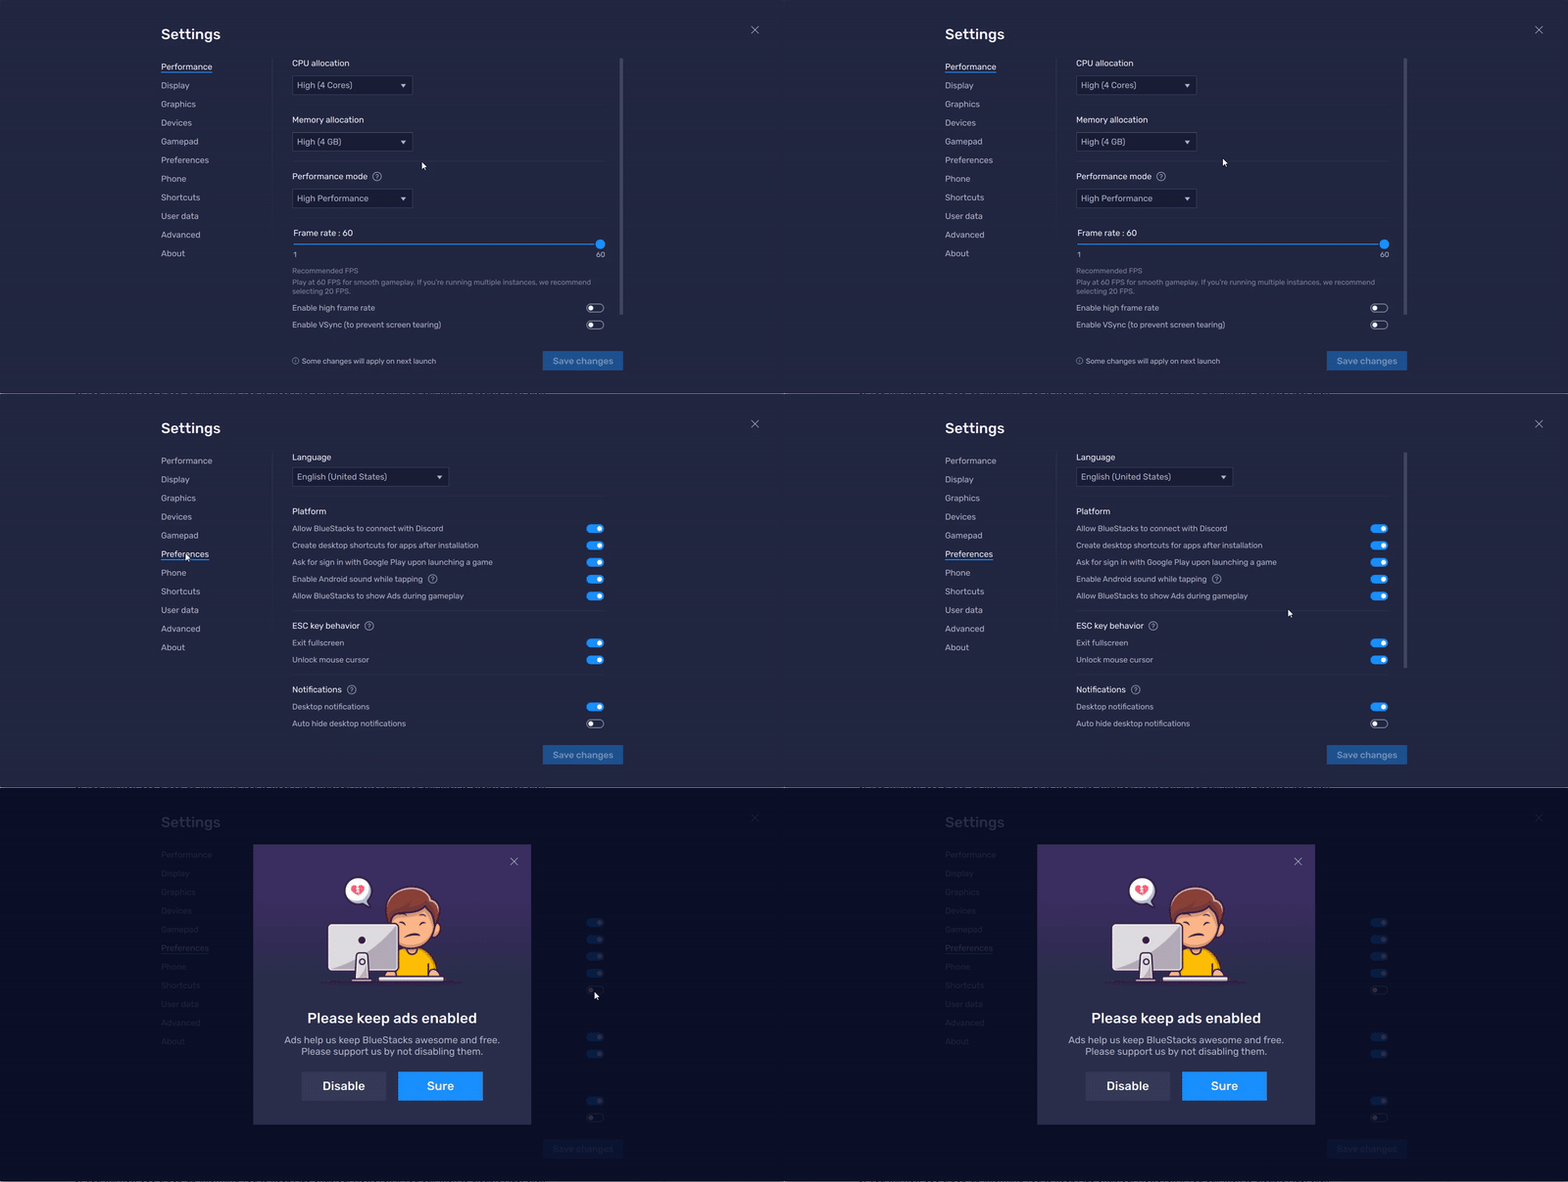
- Navigate to the “Preferences” Tab: In the settings menu, look for the “Preferences” tab.
- Look for the Ad-Free Option: In the preferences tab, you should see an option labeled “Allow BlueStacks to show Ads during gameplay“
![Look for the Ad-Free Option]()
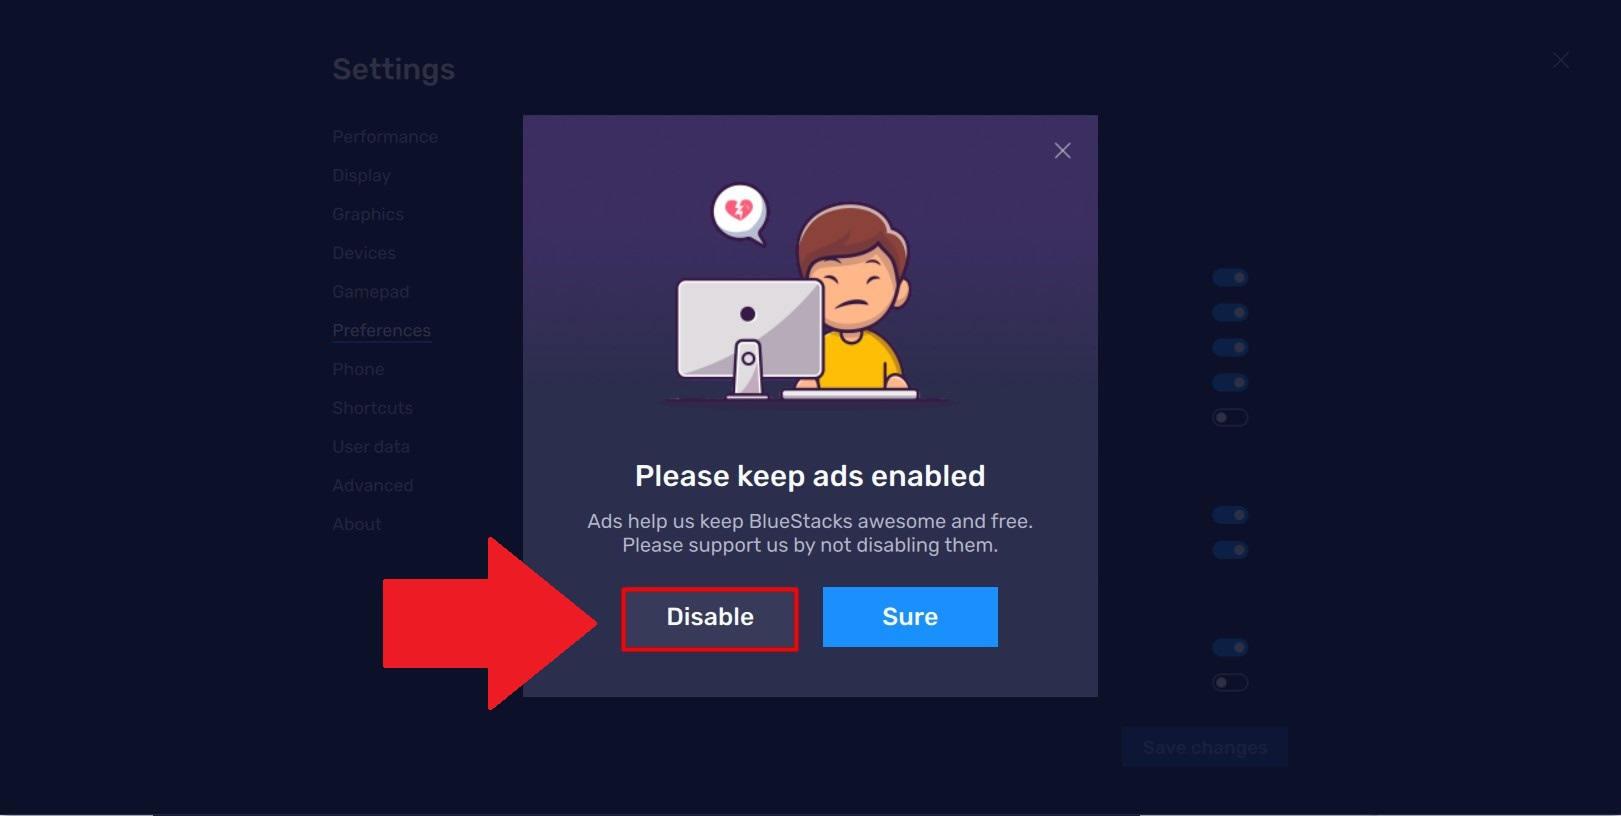
- Activate Ad-Free Mode: Turn this option on to disable ads in the emulator interface.
![disable ads]()
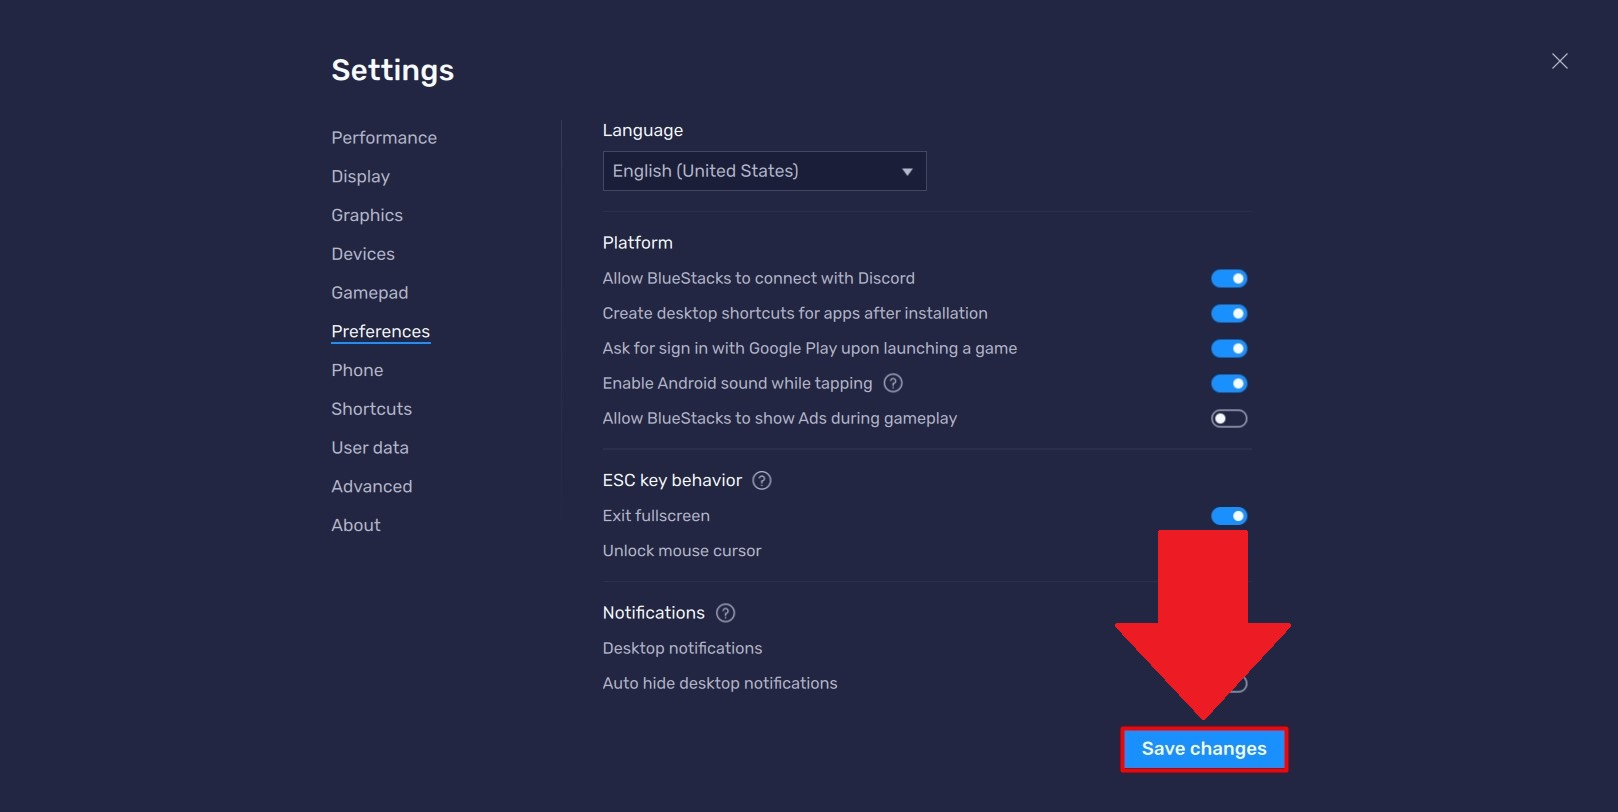
- Once you have made the selection, click on “Save changes”.
![Save changes]()
Note that enabling this option may require a BlueStacks account and, in some cases, may be part of a paid subscription, depending on the version of BlueStacks you’re using.
2. Install a Third-Party Ad Blocker
Another effective way to block ads in BlueStacks is by installing a third-party ad blocker. This works much like an ad blocker on a web browser, preventing pop-ups and banners from appearing while you use the emulator.
- Choose an Ad Blocker: You can install ad-blocking apps or browser extensions in BlueStacks. Popular Android ad blockers include AdGuard, Blokada, or AdAway.
- Install the Ad Blocker:
- Open the Google Play Store within BlueStacks.
- Search for the ad-blocking app and install it as you would any other app.
- Enable the Ad Blocker: After installation, follow the setup instructions within the ad-blocking app to start blocking ads.
This method is effective for blocking ads inside apps and games running on BlueStacks.
3. Disable Push Notifications and Pop-Ups
Some ads in BlueStacks appear as push notifications or pop-up banners. You can disable these notifications directly from the emulator’s settings:
- Go to Settings: Open BlueStacks and click on the gear icon in the top-right corner.
- Navigate to “Notifications”: Look for the “Notifications” section in the settings menu.
- Disable Notifications: Turn off all notification alerts to prevent ad pop-ups and other distracting notifications.
Disabling notifications will stop unwanted ads, but it might also block useful app alerts, so be mindful of what you turn off.
4. Use BlueStacks Premium (Paid Version)
BlueStacks offers a paid subscription called BlueStacks Premium, which removes all ads from the interface. If you’re looking for an ad-free experience and don’t want to use workarounds, subscribing to BlueStacks Premium might be the easiest solution. Here’s how to upgrade:
- Open BlueStacks: Start BlueStacks on your computer.
- Go to the Menu: Click on the three horizontal lines in the top-left corner of the emulator.
- Select “BlueStacks Premium”: You’ll be directed to the premium subscription page, where you can choose a plan and pay for a subscription.
- Activate the Subscription: Once you’ve completed the payment, ads will be completely removed from the interface.
The Premium version also offers additional features like faster performance and priority support.
5. Use a Different Version of BlueStacks
Occasionally, certain versions of BlueStacks might have more ads or intrusive advertising techniques than others. You can try installing an older or lighter version of BlueStacks that may have fewer ads.
- Uninstall BlueStacks: Go to your computer’s Control Panel (Windows) or Applications folder (Mac) and uninstall BlueStacks.
- Download an Older Version: Search for older versions of BlueStacks on reliable websites and install one that suits your needs.
- Install the Older Version: Follow the installation instructions and see if the version you downloaded has fewer ads.
Be cautious when downloading older versions of BlueStacks from third-party websites, as this may expose your computer to security risks. Always ensure you are downloading from a trusted source.
6. Adjust Your Region or Location
Sometimes, BlueStacks might show more ads based on your location. Changing the region settings on your emulator can reduce the number of ads that appear.
- Open BlueStacks: Launch the emulator.
- Go to Settings: Click on the gear icon in the top-right corner.
- Change Region Settings: Navigate to the “Region” section and select a different region (preferably one where BlueStacks shows fewer ads).
- Restart BlueStacks: Close and restart BlueStacks to apply the region change.
While this method is not guaranteed to completely eliminate ads, it can reduce their frequency.
Conclusion
BlueStacks offers various ways to minimize or eliminate ads. Whether you’re using the built-in settings, installing ad-blockers, or subscribing to BlueStacks Premium, there are several options available to improve your user experience. If you prefer an ad-free environment, the premium option may be the best solution, while more technical users can opt for ad blockers or adjust system settings.
ad


Comments are closed.