
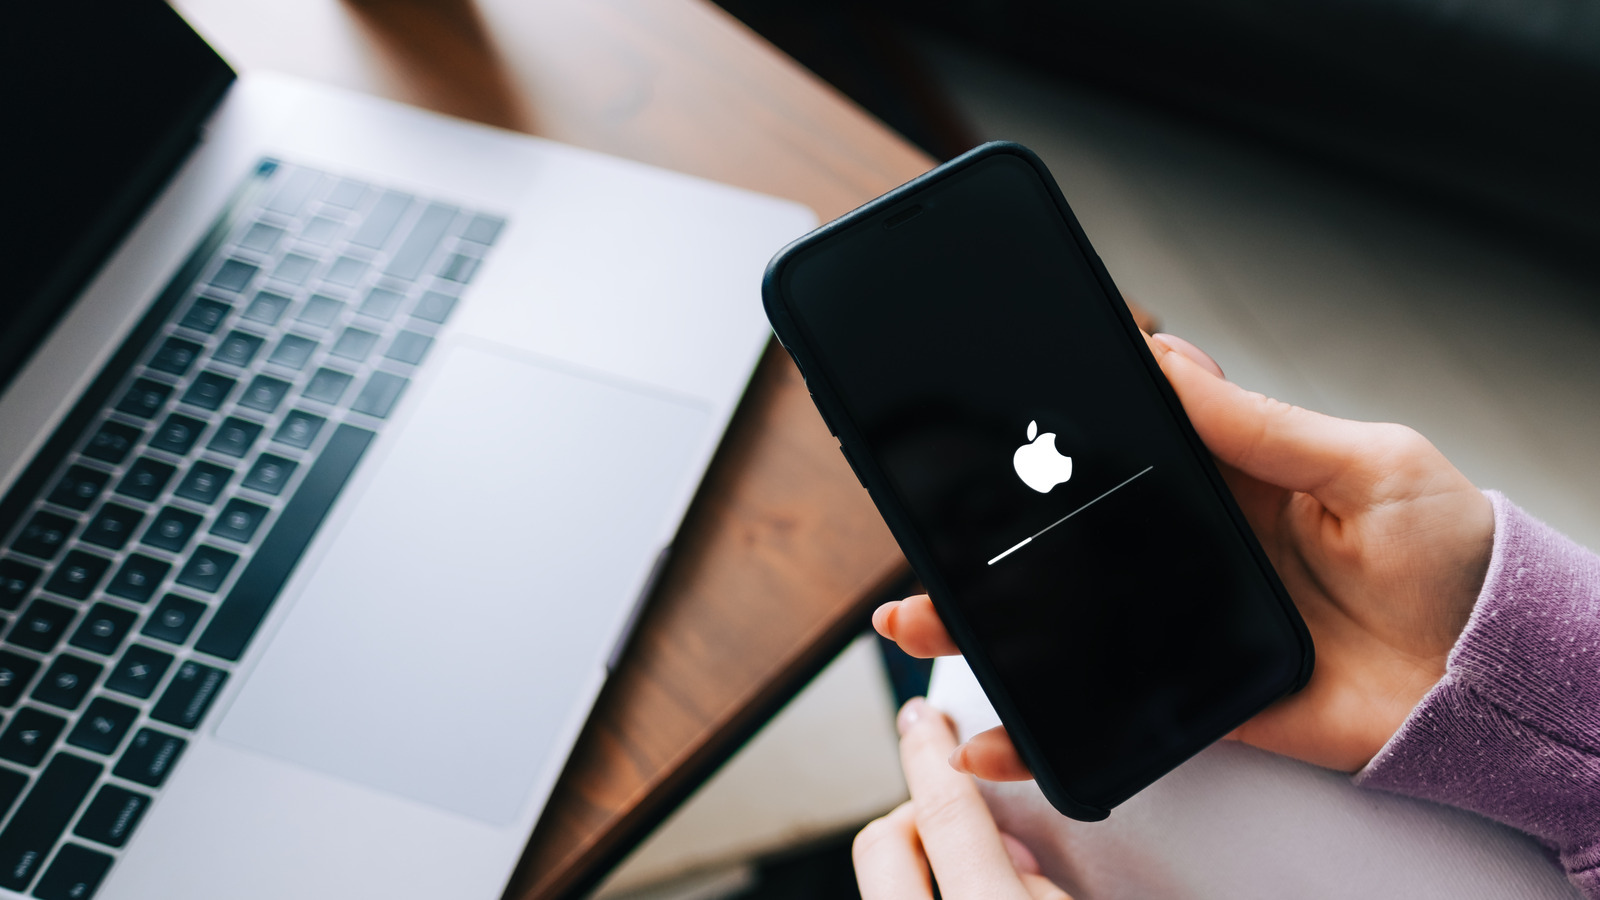
These days, the majority of peoples aren’t tethered to a desk for work, and many aren’t confined to a computer, whether it’s a laptop or not. More and more people are realizing that they can accomplish a significant portion of their tasks using their iPhone. If not, it’s highly likely they can use their phone to remotely connect to a Mac and carry out their work.
In this article, I’ll take you through the steps of configuring remote access on both your Mac and iPhone and explain the reasons behind wanting to control a MacBook with an iPhone.
ad
Why would I need to control a Mac from an iPhone?
At first, it might seem a bit strange that someone would want to learn how to control a Mac from an iPhone. You may question its practicality, especially given the smaller size of the iPhone screen compared to any Mac. However, the reality is that it proves to be an incredibly useful tool. Even though a MacBook or MacBook Pro is almost as portable as your phone, there’s a certain ease associated with using your iPhone.
Yet, there are moments when you don’t want to carry a computer or a backpack. Perhaps you’re just going out for the night and don’t want to unfold your laptop on the table. Whatever the reason, here’s a list of common situations where remote access can be particularly helpful:
ad
- Accessing files remotely: When you’re on the go and need to reference a file on your Mac.
- Giving presentations: During a presentation, if you need to smoothly switch between multiple files or applications, remote access allows you to do so seamlessly from your iPhone.
- Technical support: If you need to troubleshoot an issue on someone else’s Mac, remote access enables you to take control of their computer and troubleshoot.
These are just a few examples, but the bottom line is that it provides you with the flexibility and convenience to work from anywhere at any time.
How to control Mac with iPhone
Having the ability to remote into a Mac is an incredibly useful feature, and although it’s a fairly straightforward process, it does involve multiple steps. Let’s delve into those steps now!
Step 1: Set up remote access on your Mac
As a security precaution, it is necessary to enable remote access on the Mac before assuming control. Otherwise, there would be a risk of anyone being able to control any Mac. Here’s how to ensure that this feature is activated on your Mac:
- Click on the Apple menu located in the top-left corner.
- Select System Preferences.
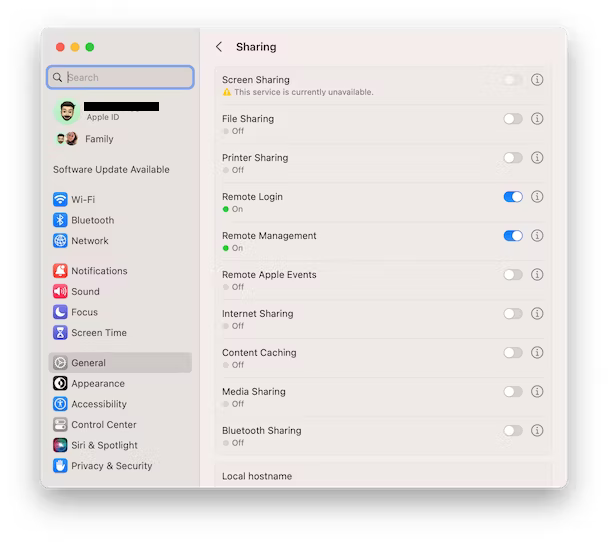
- Click on General > Sharing.
- Turn on Remote Management.
- Specify the actions local users can perform on your computer and click OK.
- Click on the information (i) icon next to Remote Management, and choose the users permitted to access your Mac remotely. Navigate to Computer Settings in the same window and select the features you wish to allow.
- Click Done.
Step 2: Download a Remote Desktop App on your iPhone
After activating remote access on your Mac, the next step involves downloading a remote desktop app on your iPhone. Several options are available, and among the most widely used are:
- TeamViewer
- Splashtop
- Remote Desktop
- Microsoft Remote Desktop
If you opt for a different app, conduct some research to ensure its safety before installation.
Step 3: Connect your iPhone to your Mac
Once you have successfully downloaded a remote desktop app, the next step is to establish a connection between your iPhone and your Mac. Here’s how you can do it:
- Open the remote desktop app on your iPhone.
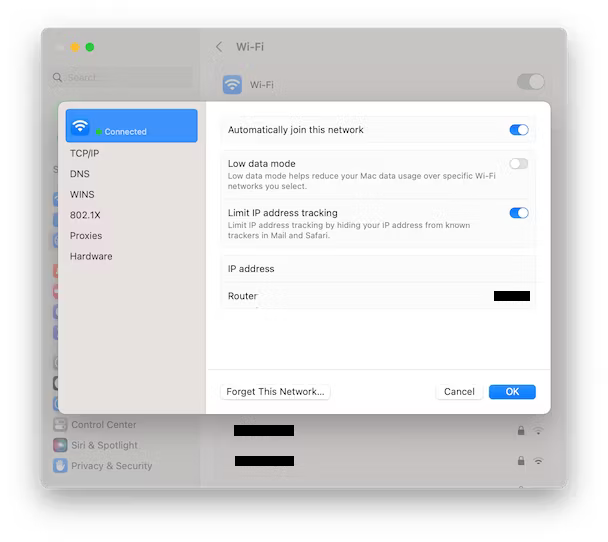
- Enter the IP address of your Mac.
Note: To find your Mac’s IP address, go to the Apple menu, select System Preferences, then click on Network > Wi-Fi. Click on Details next to the connected network and locate the IP address. Alternatively, you can find this information under TCP/IP. Ensure the accuracy of the entered IP address to establish a proper connection.
- Enter the username and password that you typically use to sign in to your Mac.
- Click the “Connect” button.
Step 4: Control your Mac from your iPhone
After establishing a connection between your iPhone and your Mac, you gain the ability to control your Mac directly from your iPhone. Here are several actions you can perform:
- Open and close programs.
- Browse files.
- Copy and paste files.
- Access your desktop.
- Share your screen.
- Control your Mac using touch gestures.
Tips for a better remote access experience
Remote access is incredibly valuable for a variety of reasons, but optimizing for a smoother and more secure experience requires attention to certain factors. The last thing you’d want is to compromise your Mac’s security while trying to streamline your work. Here are some tips to enhance your remote access experience and protect your data:
- Ensure Mac Connectivity and Power: Confirm that your Mac is connected to the internet and turned on. It may seem basic, but many remote access issues arise from a Mac that is either offline or not powered up.
- Check iPhone Internet Stability: Ensure the stability of your iPhone’s internet connection. While the Mac’s internet connection is crucial for remote access, slow bandwidth on the Mac’s network can hinder control from your iPhone. Both the Mac and iPhone should have strong connections.
- Close Unnecessary Apps on Mac: Improve overall Mac performance during remote access by closing unnecessary apps. Running multiple applications simultaneously can impact performance, even when controlling the computer remotely.
- Use a Password Manager: Securely store your login information with a password manager. This is especially important for remote access, where entering login details poses a security risk. A password manager adds an extra layer of protection against unauthorized access.
- Consider Using a VPN: Enhance security by encrypting your internet traffic with a VPN, especially when accessing your Mac remotely over a public Wi-Fi network. Using a VPN provides an additional layer of security, protecting your data from potential hackers or unauthorized access.
By following these recommendations, you not only optimize your remote access experience but also ensure the safeguarding of sensitive information.
FAQ’s
Why control a Mac from an iPhone?
Controlling a Mac from an iPhone might seem unusual, but it’s incredibly useful, offering convenience in various scenarios, even when a MacBook is portable.
When is remote access helpful?
Remote access is beneficial for tasks like accessing files on the go, seamless presentations, and troubleshooting on someone else’s Mac.
Steps for setting up remote access on a Mac?
- Click on Apple menu > System Preferences > General > Sharing.
- Turn on Remote Management.
- Specify user actions and click OK.
- Choose users and features under Remote Management.
- Click Done.
Recommended remote desktop apps for iPhone?
Popular apps include TeamViewer, Splashtop, Remote Desktop, and Microsoft Remote Desktop. Ensure safety by researching before installation.
How to connect iPhone to Mac using remote desktop?
- Open the app on your iPhone.
- Enter the IP address of your Mac.
Note: Find your Mac’s IP address in System Preferences > Network > Wi-Fi > Details or under TCP/IP.
What actions can be performed after connecting iPhone to Mac?
Actions include opening/closing programs, browsing, copying/pasting files, accessing the desktop, screen sharing, and using touch gestures.
Tips for optimizing remote access?
Optimize by ensuring Mac connectivity, stable iPhone internet, closing unnecessary apps, using a password manager, and considering a VPN for added security.
Conclusion
The ability to control your Mac from an iPhone emerges as a practical and versatile solution, defying initial skepticism. Whether facilitating on-the-go file access, smooth presentations, or efficient troubleshooting, this capability proves invaluable. The provided steps and recommendations empower users to fully embrace this feature, ensuring a convenient and efficient workflow from any location, at any time.
ad
Comments are closed.