How to change the screenshot location on Mac
By changing the location where your Mac saves screenshots you can keep your desktop organized and clutter free. The screenshot tools provided by Mac are truly impressive. As someone who frequently captures screenshots, for work purposes I find them incredibly useful compared to Windows equivalents. It’s these effective features that contribute to making Macs stand out as top notch computers.
Regrettably macOS automatically saves screenshots to the Desktop leading to an cluttered display. What’s the point of having a Mac if your screen is in disarray?
ad
Thankfully changing the default location on Mac is quite straightforward – as easy, as learning how to take a screenshot on Mac in the first place. There are a couple of methods you can use to accomplish this task.
How to change the screenshot location on Mac
The easiest method is by using the screen capture tool.
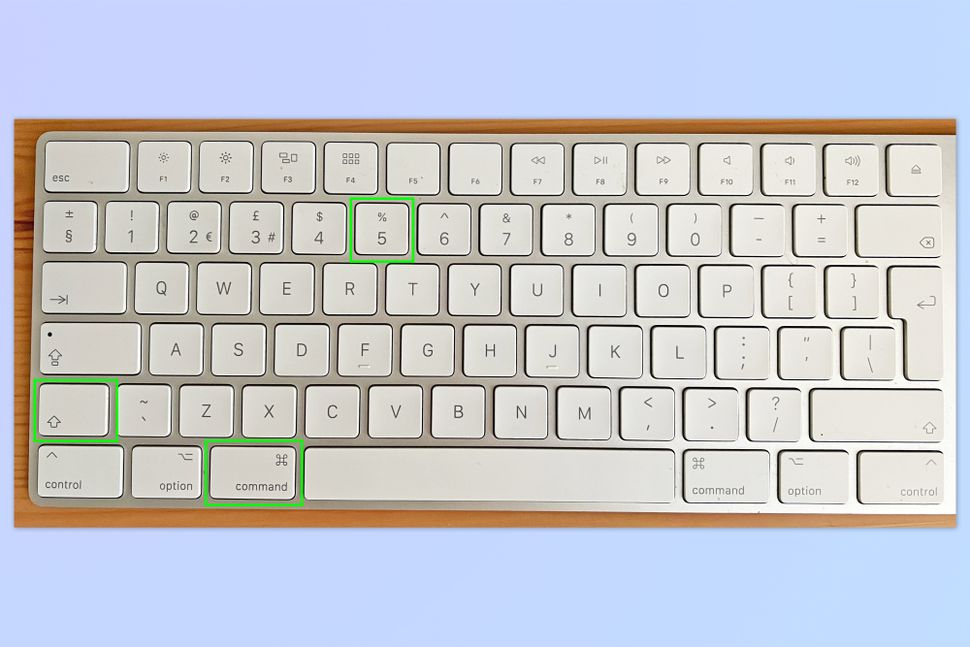
- Press Shift + Cmd + 5 to open the screenshot tool.
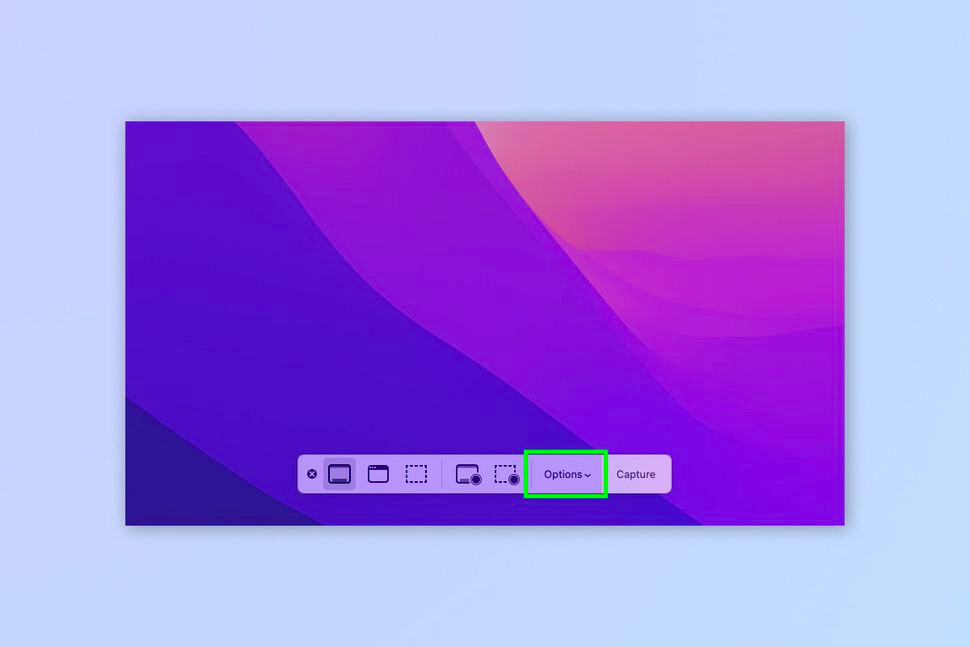
![Press Shift + Cmd + 5 to open the screenshot tool]() Click Options.
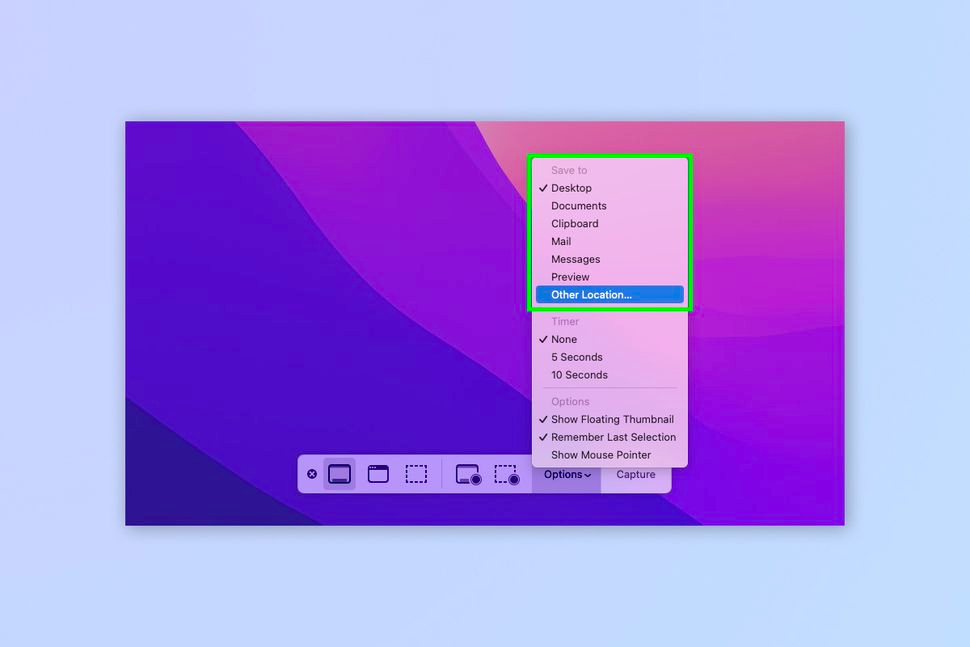
Click Options.![Click Options]() Under Save to, select one of the pre-defined save locations to complete the process. Alternatively, click Other Location to specify your own.
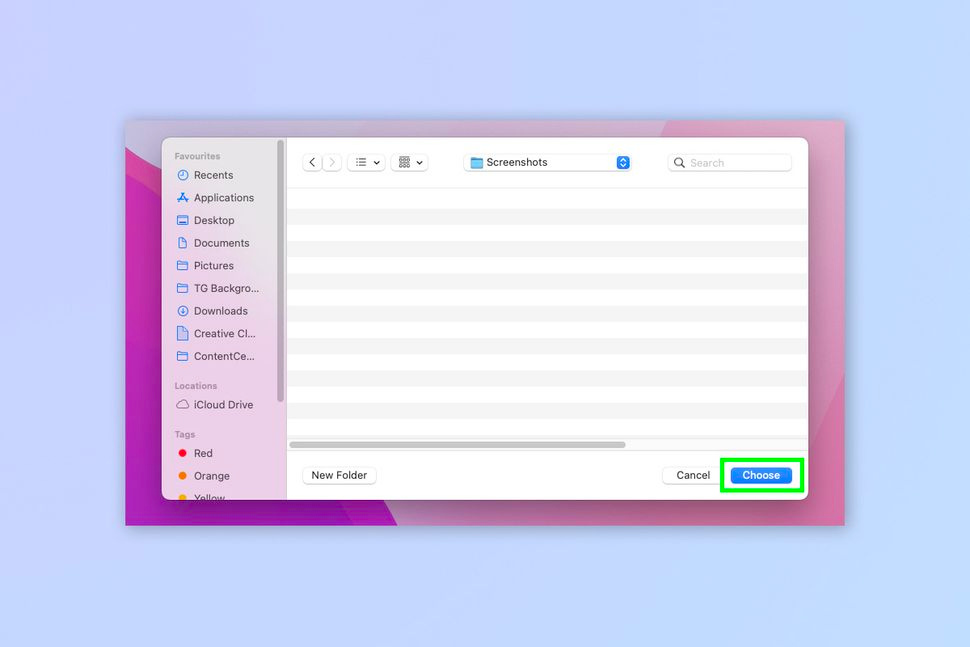
Under Save to, select one of the pre-defined save locations to complete the process. Alternatively, click Other Location to specify your own.![select one of the pre-defined save locations to complete the process]() Select or create a folder for saving your screenshots, then click Choose.
Select or create a folder for saving your screenshots, then click Choose.![Select or create a folder for saving your screenshots, then click Choose]()
ad
How to change screenshot location on Mac using Terminal
There’s also an advanced method for changing your screenshot location. This approach is ideal for those experimenting with Terminal and using their Mac in a more detailed manner. It’s also helpful if you’re experiencing keyboard issues or using a non-Mac keyboard that doesn’t fully support the screenshot tools.
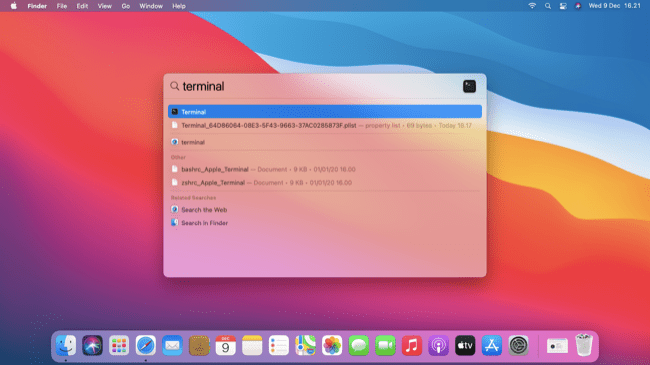
- Open Terminal.
![Open Terminal]() Enter the following command into Terminal (but don’t press Enter yet):
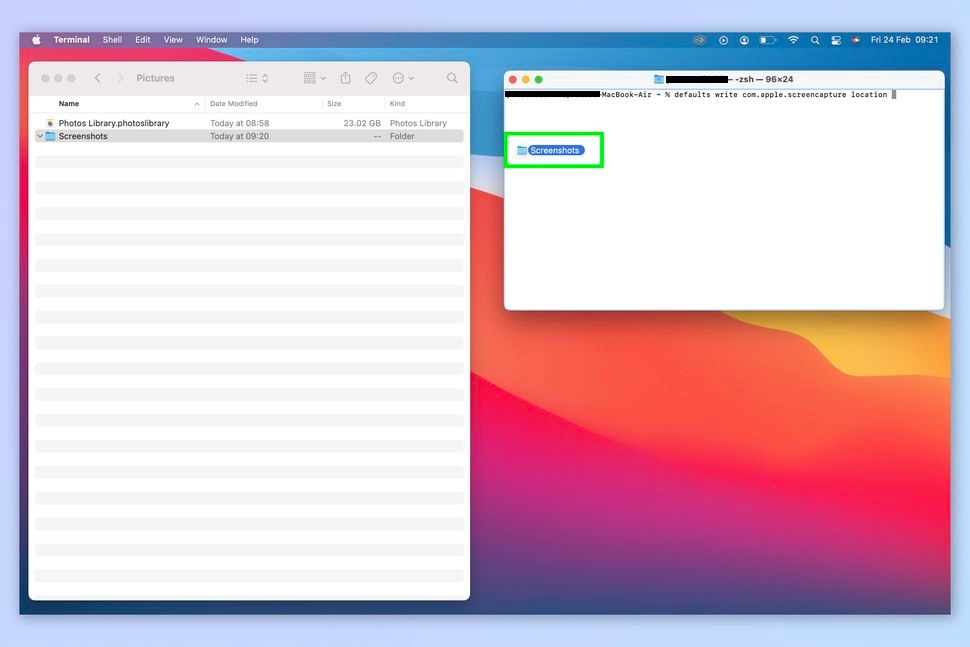
Enter the following command into Terminal (but don’t press Enter yet):defaults write com.apple.screencapture locationOmit the quotation marks, but include the space after “location”.![Enter the following command into Terminal]()
- Find the Finder folder where you want to save your screenshots and drag it into the Terminal window. When its file path appears at the end of your command from step 2, press Enter.
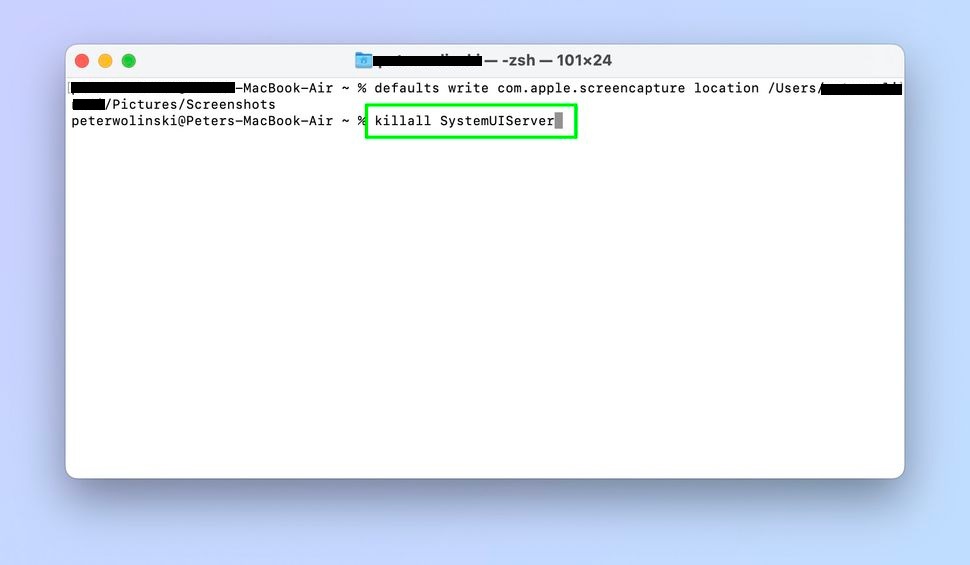
![Find the Finder folder where you want to save your screenshots]() Type the following command into Terminal and press Enter:
Type the following command into Terminal and press Enter:killall SystemUIServer![killall SystemUIServer]()
You’re all set! Your screenshots will now be saved in the folder you specified, and you can enjoy the satisfaction of being a true Mac power user.
📚 Also Read: How to type a hashtag on Mac
Screenshot Shortcut
Many peoples continue to access the tool through Spotlight or the launchpad. There exists a specific shortcut, for this task!
By pressing Shift + Command + 3 you can capture a screenshot effortlessly. Save some time.
FAQ’s
Why should I change the default screenshot location on my Mac?
Changing the default screenshot location helps keep your desktop organized and clutter-free. By saving screenshots to a designated folder, you prevent your desktop from becoming messy, making it easier to find and manage your files.
What if I’m using a non-Mac keyboard or have keyboard issues?
If you’re using a non-Mac keyboard or have keyboard issues, the Terminal method is a reliable alternative to change the screenshot location, as it doesn’t rely on the screenshot tool’s keyboard shortcuts.
Can I quickly capture a screenshot without opening the screenshot tool?
Yes, you can capture a screenshot quickly by pressing Shift + Command + 3. This shortcut takes a screenshot of your entire screen and saves it to the default location.
How do I revert to the default screenshot location after changing it?
To revert to the default location, you can follow the same Terminal steps and replace the file path with your Desktop folder path, or use the built-in screenshot tool to reset to the Desktop.
Will changing the screenshot location affect how screenshots are named or organized?
No, changing the location does not affect how screenshots are named or organized. They will be saved with the same default naming convention, but in the new folder you specify.
Conclusion
Changing your Mac’s screenshot location is a quick and easy way to keep your desktop tidy. Whether you use the built-in tool or Terminal, both methods help you save screenshots to a designated folder, making your workspace more organized and efficient. Enjoy a clutter-free desktop and a smoother workflow with these simple adjustments.
ad


 Click Options.
 Under Save to, select one of the pre-defined save locations to complete the process. Alternatively, click Other Location to specify your own.
 Select or create a folder for saving your screenshots, then click Choose.
 Enter the following command into Terminal (but don’t press Enter yet):
 Type the following command into Terminal and press Enter:
Comments are closed.