
Microsoft Word is likely the most widely used word processor in the world, with many of us having it installed on our Macs for creating documents. It’s a common experience to feel panicked when a Word document you’ve been working on disappears without being saved.
This issue may arise if the app was accidentally closed, if it crashed, or if your Mac experienced a sudden system error. However, knowing how to recover an unsaved Word document on your Mac can help you easily retrieve your files and prevent data loss in the future.
ad
 Thankfully, there are several methods to recover an unsaved Word document on a Mac, including using Word’s own recovery tools, macOS utilities, and specialized data recovery applications.
Here’s a brief overview of the recovery options available. For more information, see below.
| The reason a Word document was lost | Solution |
|---|---|
| I accidentally deleted an important Word file that is no longer in the Trash. | Recover the Word document on Mac using Time Machine or try data recovery software. |
| The document was recently deleted by the user. | Search the Mac Trash for the lost file. |
| I had to force quit Word and need to recover files. | Use the AutoRecovery feature. |
| Word froze and I did not save the document. | Check the Mac Temp folder or try AutoRecovery. |
| Word crashed while I was working on a document. | Use AutoRecovery or check the Mac Temp folder. |
| I need to recover an unsaved Word document, but AutoRecovery was not enabled. | Try searching the Mac Temp folder or recovering from within the Word app. |
| I want to restore an earlier version of a Word document on my Mac. | Recover an earlier version of the file with a Time Machine backup or from a backup. |
| My Word document got corrupted and I can’t open it. | Attempt to repair the document or restore from previous versions. |
How to Recover Unsaved Word Document on Mac
ad
Have you ever closed a Word document before saving it, or experienced a sudden Word crash that caused you to lose all your progress? These situations can be quite frustrating, but this section provides several methods to help you recover unsaved Word documents on your Mac.
1. Recover Unsaved Word Docs on Mac with AutoRecovery
Microsoft Word for Mac includes an AutoRecovery feature that helps you recover unsaved documents. By default, this feature is enabled during installation and automatically saves a copy of open documents every 10 minutes.
You can modify this setting to change the save interval according to your preference. If the application or your computer crashes while you’re working on a Word document, you can restore it to the state it was in at the time of the last automatic save.
- Open a Finder window on your Mac.
- Select the entire computer as the location to be searched and enter ‘AutoRecovery’ in the Search field. You will see a list of files starting with ‘AutoRecovery save of’ followed by the name of the Word document you are trying to recover.
![search-AutoRecovery]() Double-click on the file to open it in Microsoft Word.
Double-click on the file to open it in Microsoft Word.- Select the File menu, choose Save As, pick a new name for the document and a folder to store it in, then click the Save button.
![save-AutoRecovery-file]()
 Double-click on the file to open it in Microsoft Word.
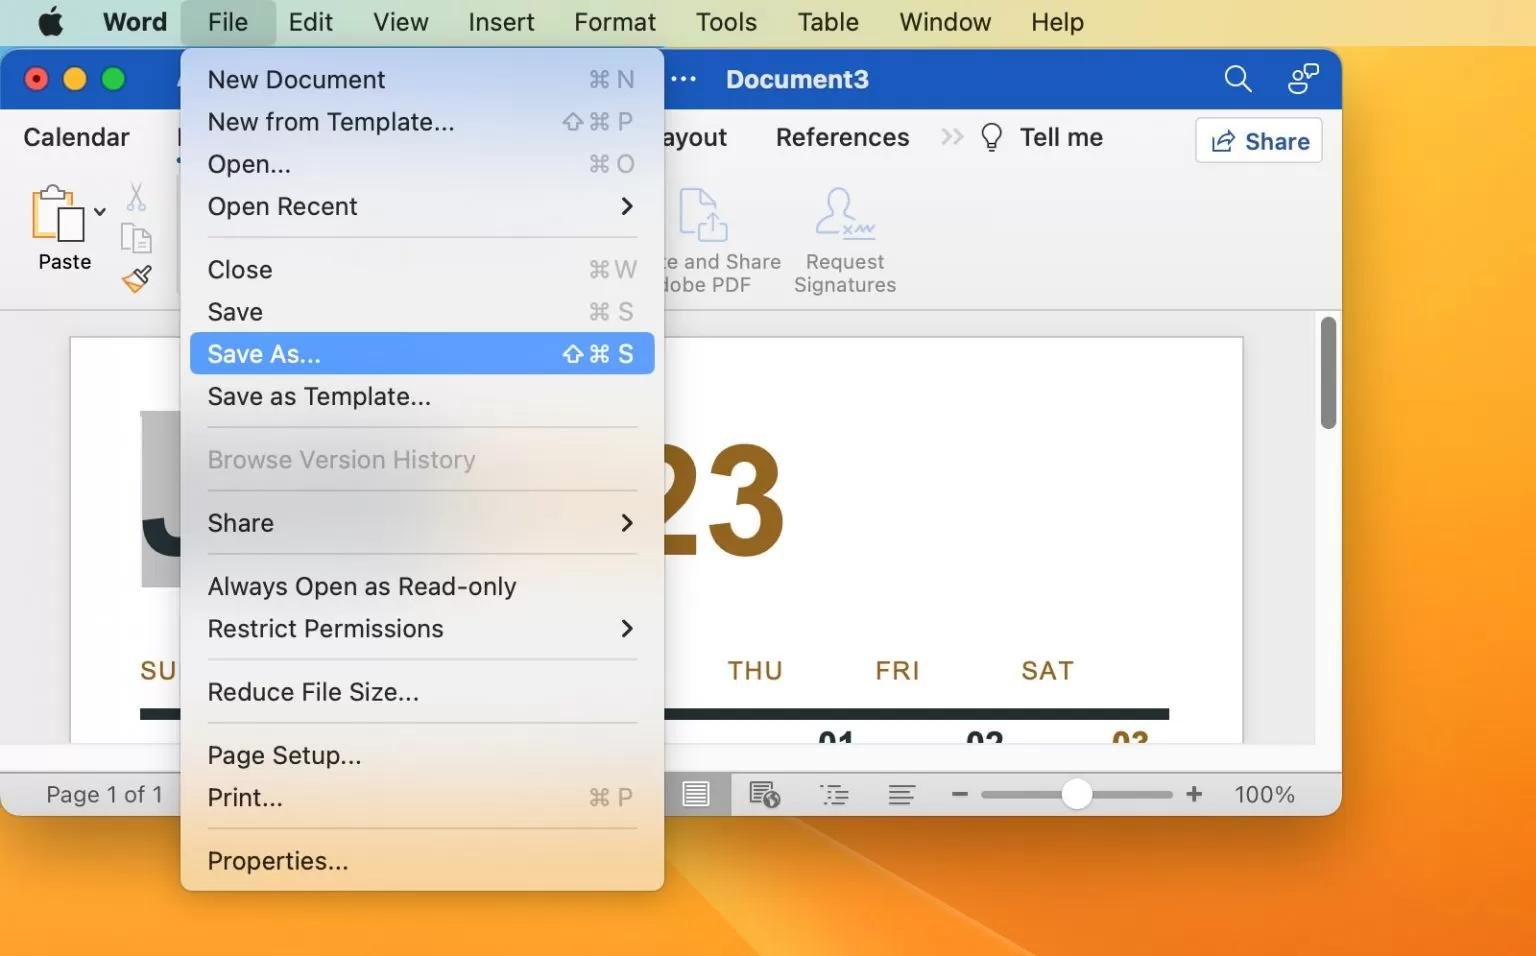
2. Recover Lost Word docs from the Mac Temporary Folder
Your Mac’s temporary folder might contain the lost Word file you need. Follow these steps to check its contents:
- Open Terminal.
- Type:
cd $TMPDIR. - Type:
lsto display the files. Look in the TemporaryItems subfolder for your document. - Search for the lost file. If you find the Word document you are looking for, protect it by saving a copy to a new storage location.
![Mac Temporary Folder]()

3. Restore a Previous Version of a Word File from Within the Word App
- Open the most recent version of the Word file you want to recover.
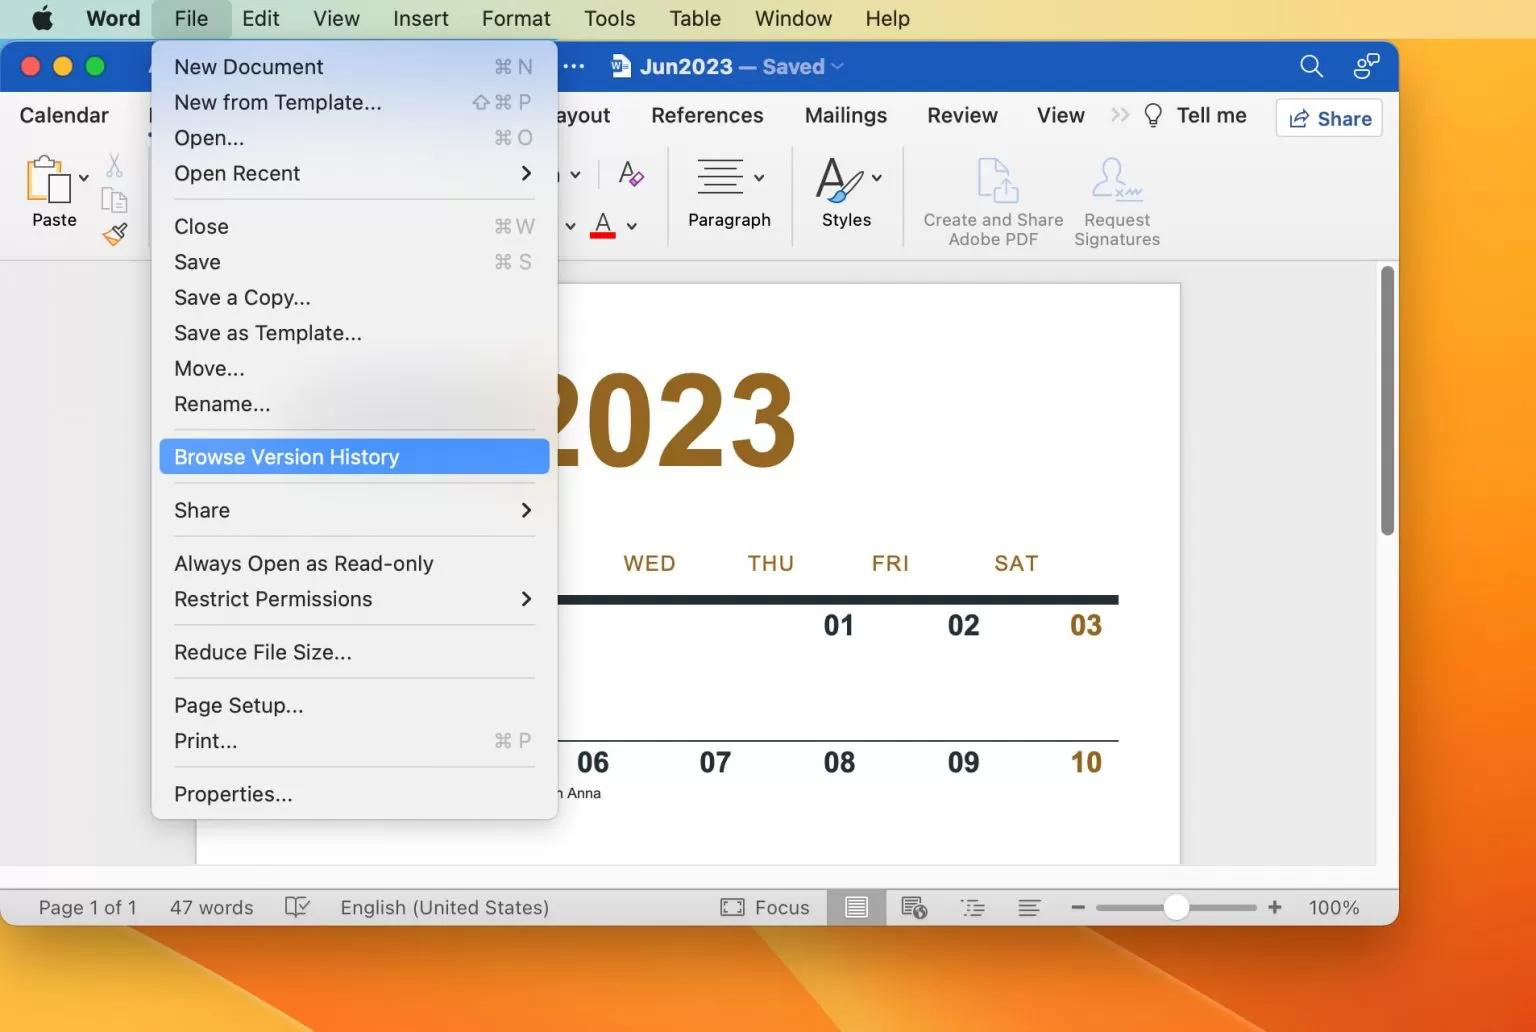
- In Word, go to File > Browse Version History.
![go to File Browse Version History]() A panel will display all previously saved versions of the file.
A panel will display all previously saved versions of the file.- Select the version you wish to recover and choose Restore to complete the process.
![Select the version you wish to recover and choose Restore to complete the process]()
 A panel will display all previously saved versions of the file.
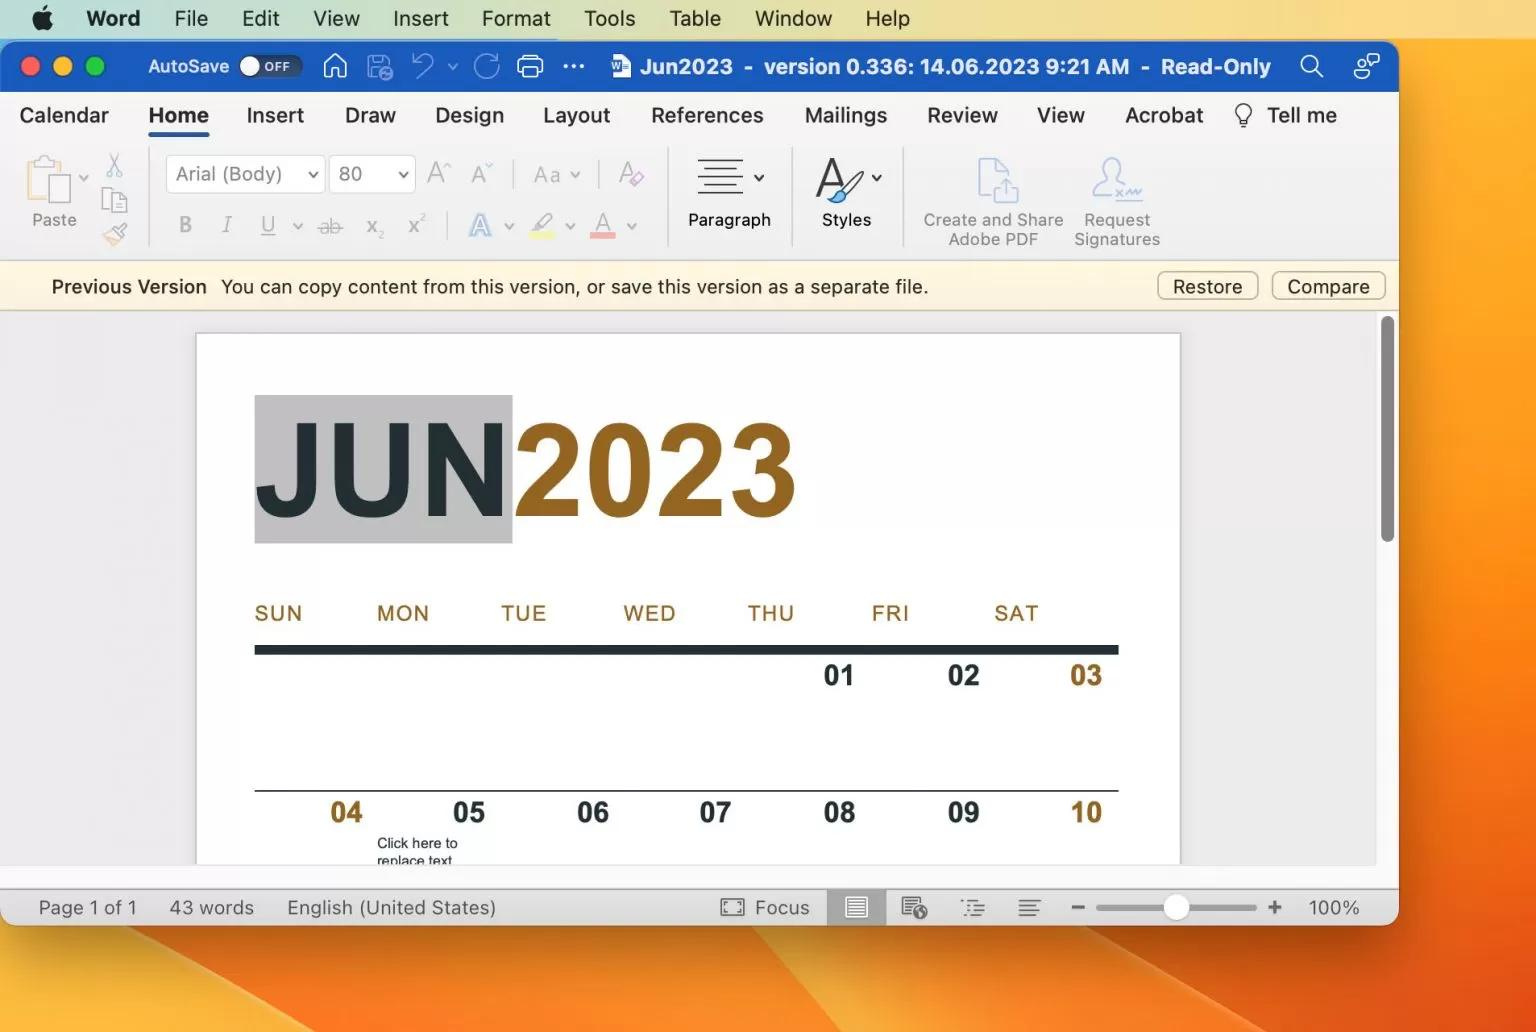
How to Recover Deleted Word Documents on Mac
Almost every seasoned Mac user has accidentally deleted the wrong file at least once, so don’t feel too bad if it happened to you too. Instead of lamenting the loss, follow our step-by-step guide on how to recover deleted Word documents on your Mac to quickly and efficiently retrieve your valuable document.
1. Recover Deleted Word Documents from a Trash Bin
Files deleted from a folder will no longer be visible in that location. However, they are not permanently removed from your Mac until you empty the Trash.
To recover a deleted file:
- Open the Trash folder by clicking its icon in the lower-right corner of your Mac’s screen.
![Open the Trash folder]() Right-click on the file name and select “Put Back” to return the file to its original location.
Right-click on the file name and select “Put Back” to return the file to its original location.![Right-click on the file name and select “Put Back” to return the file to its original location]()
 Right-click on the file name and select “Put Back” to return the file to its original location.
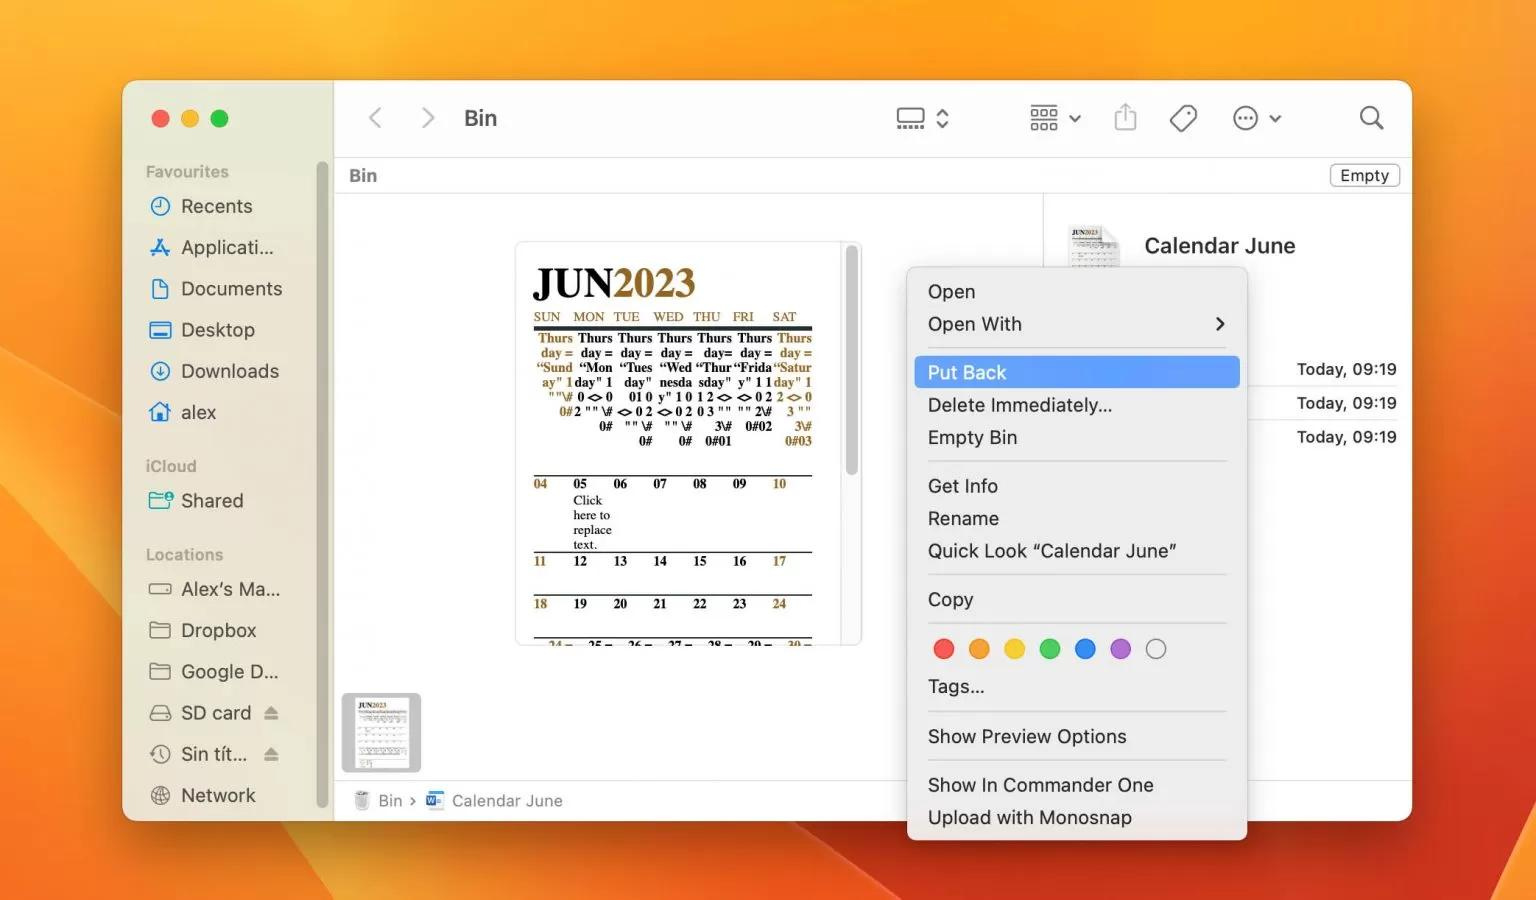
2. Recover Deleted Word Documents Using Disk Drill
Word document recovery software like Disk Drill can be instrumental in recovering important Word files that have mysteriously vanished from your computer. It uses deep scanning technology to locate deleted files and file fragments that are still physically present on your computer’s storage but are no longer visible to the operating system.
Follow these steps to recover a Word document on your Mac:
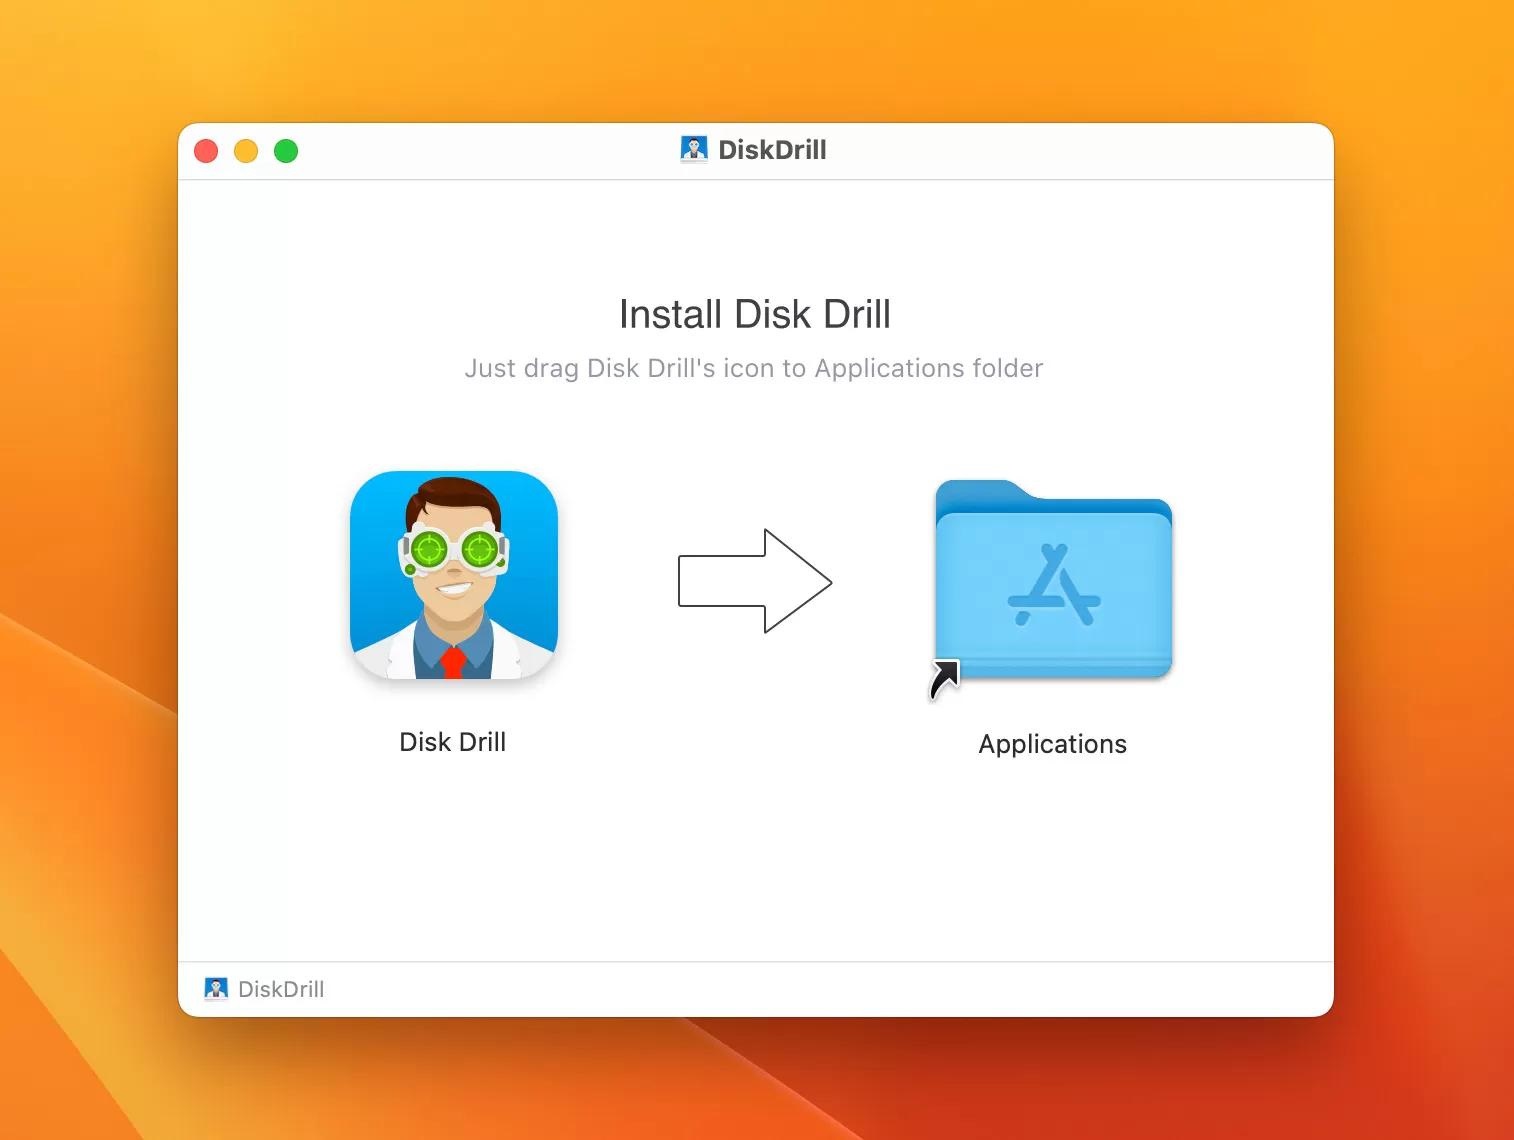
- Download and install the free version of Disk Drill.
![Disk Drill-interface]() Launch the application and select the disk where your lost documents were last seen.
Launch the application and select the disk where your lost documents were last seen.- Click the ‘Search for lost data’ button to start scanning your storage device.
![Click the ‘Search for lost data’ button to start scanning your storage device]() Use filters to display specific types of files to speed up the search. If a preview of a selected file can be displayed, then the file can be recovered. However, you need to upgrade to the Pro version of Disk Drill to perform the recovery.
Use filters to display specific types of files to speed up the search. If a preview of a selected file can be displayed, then the file can be recovered. However, you need to upgrade to the Pro version of Disk Drill to perform the recovery.![Use filters to display specific types of files to speed up the search]() Click ‘Recover’ and choose where you want to restore your lost Word files.
Click ‘Recover’ and choose where you want to restore your lost Word files.![Click ‘Recover’ and choose where you want to restore your lost Word files]()
 Launch the application and select the disk where your lost documents were last seen.
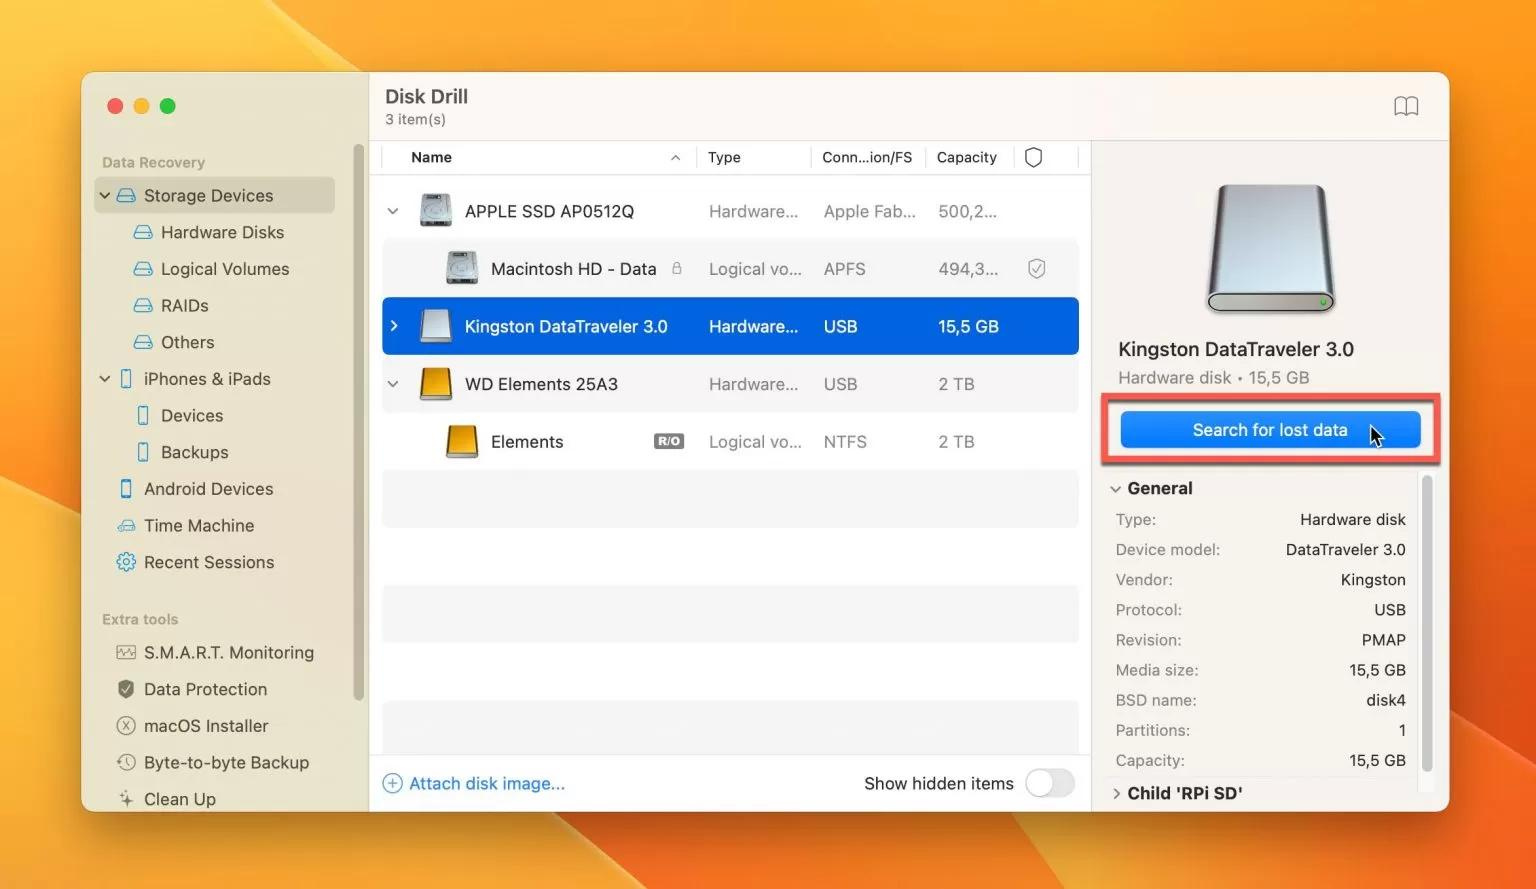 Use filters to display specific types of files to speed up the search. If a preview of a selected file can be displayed, then the file can be recovered. However, you need to upgrade to the Pro version of Disk Drill to perform the recovery.
 Click ‘Recover’ and choose where you want to restore your lost Word files.
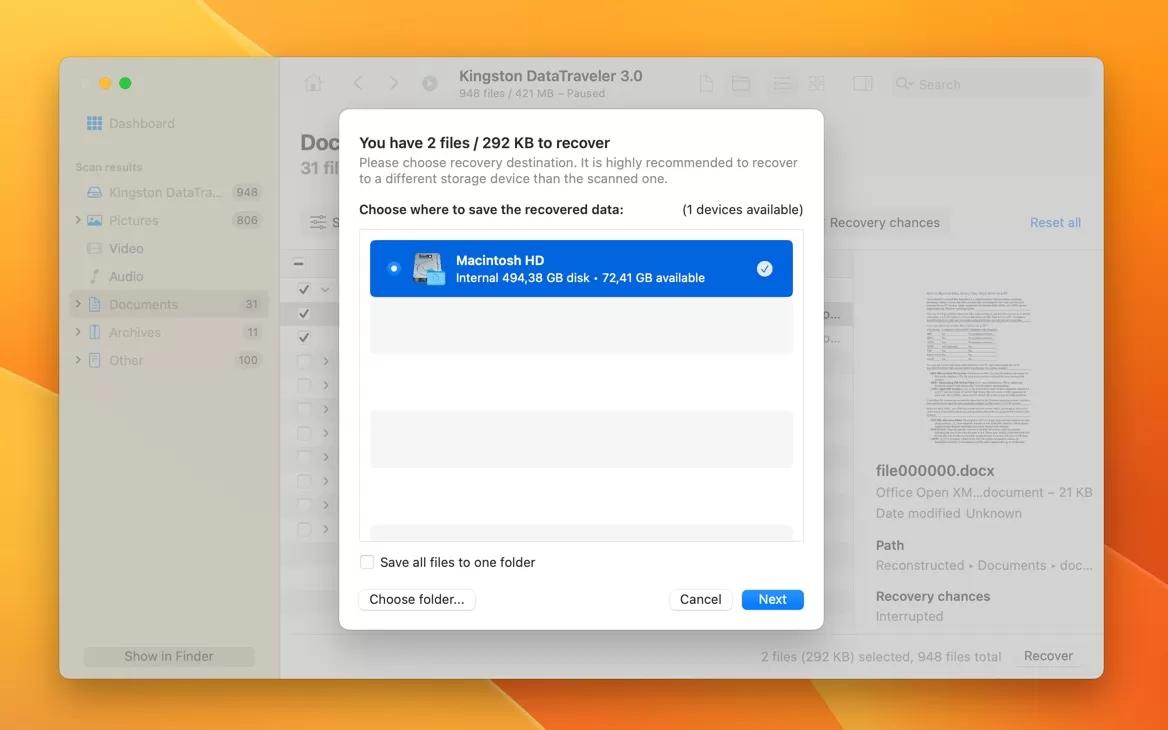
3. Recover Lost Word Document Using Time Machine
If you’re using Time Machine to back up your Mac, you may be able to recover your lost Word document from the backup media.
Steps to recover a lost Word file from a Time Machine backup:
- Connect the storage device that contains the Time Machine backup files to your computer.
- Open a Finder window in the folder that previously stored the lost Word file.
- Launch Time Machine by clicking the Time Machine icon on the menu bar.
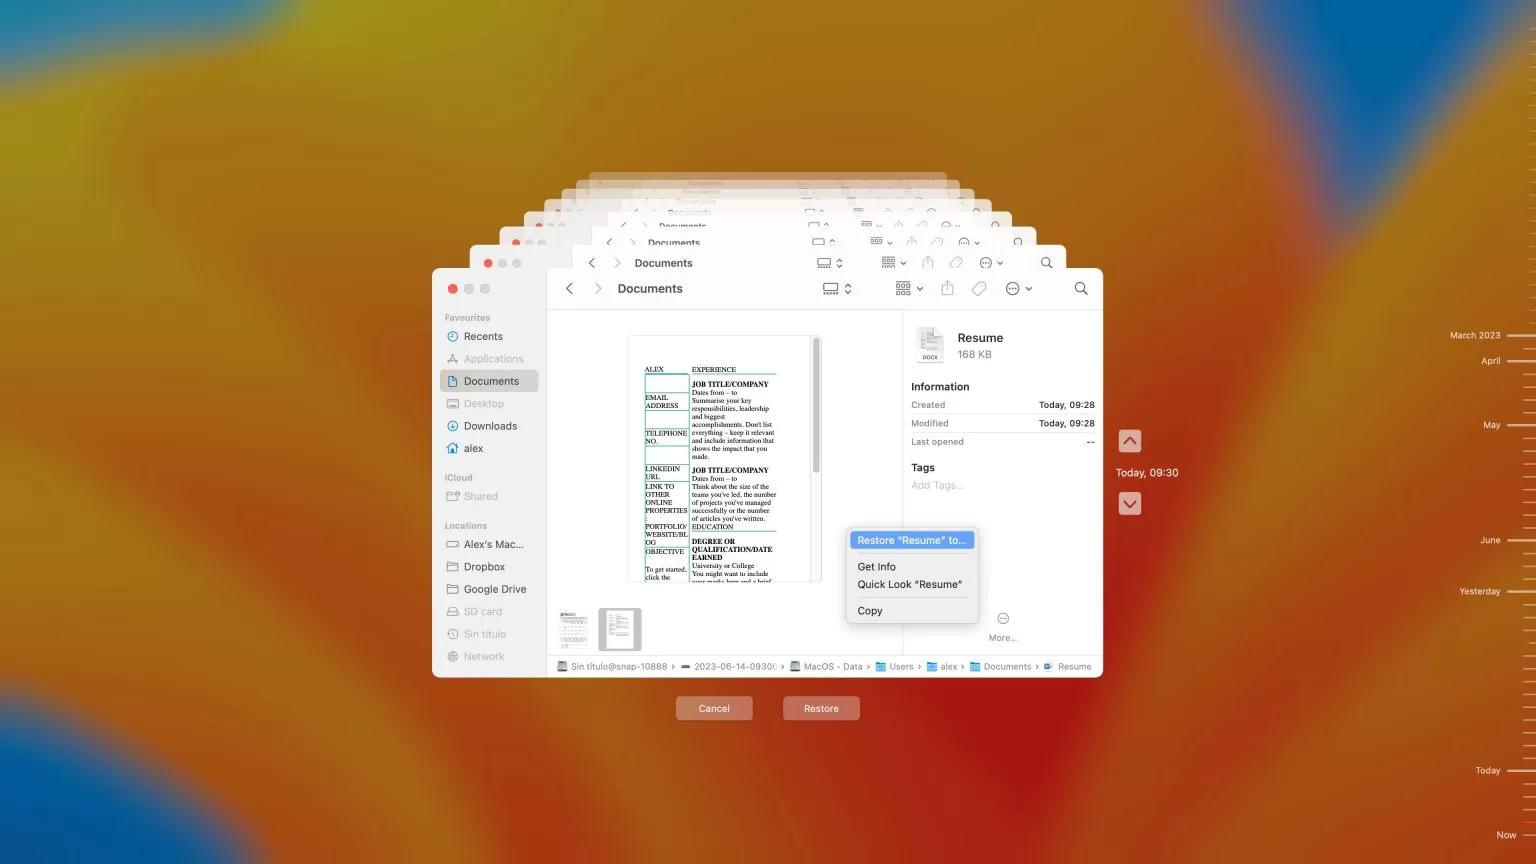
![Launch Time Machine by clicking the Time Machine icon on the menu bar]() Use the timeline and arrows to search through the snapshots and backups to find the Word document you want to restore.
Use the timeline and arrows to search through the snapshots and backups to find the Word document you want to restore.- Highlight the file you want to recover and click the Restore button. The document will be restored to its original location.
![Highlight the file you want to recover and click the Restore button]()
4. Try Different Backup Solutions to Recover a Lost Word Document on Mac
There are several backup solutions you can use to retrieve copies of lost Word documents on your Mac:
☁️ Use iCloud: If iCloud backups are enabled on your Mac, you might find a copy of your Word document in iCloud Drive. It’s a good idea to check this backup location via the web, as you can view all Recently Deleted files even if they are no longer on your computer.
💿 Examine your external devices: If you regularly back up your files to external devices like USB drives or external hard drives, check these devices. There’s a chance that a copy of your lost Word document may be stored there.
🗂️ Check the Downloads folder: Word documents downloaded from the web, instant messengers, or team collaboration apps often end up in the Downloads folder. It’s worth checking there, as you might find an old copy of your missing document.
💬 Check your messages: If someone shared the Word document with you via iMessage, Telegram, WhatsApp, Viber, or email, reviewing your chat history might help you locate the file.
🔎 Manually search for the missing file: Use Finder’s search feature to perform a thorough manual search in all potential backup folders. Searching by the document’s name or extension (.doc or .docx) can help narrow down the results.
📚 Also Read: How to make a PDF on Mac
How to Recover Text from a Damaged Word File
Microsoft Word includes a built-in feature to repair corrupted files. Follow these steps to use this recovery method:
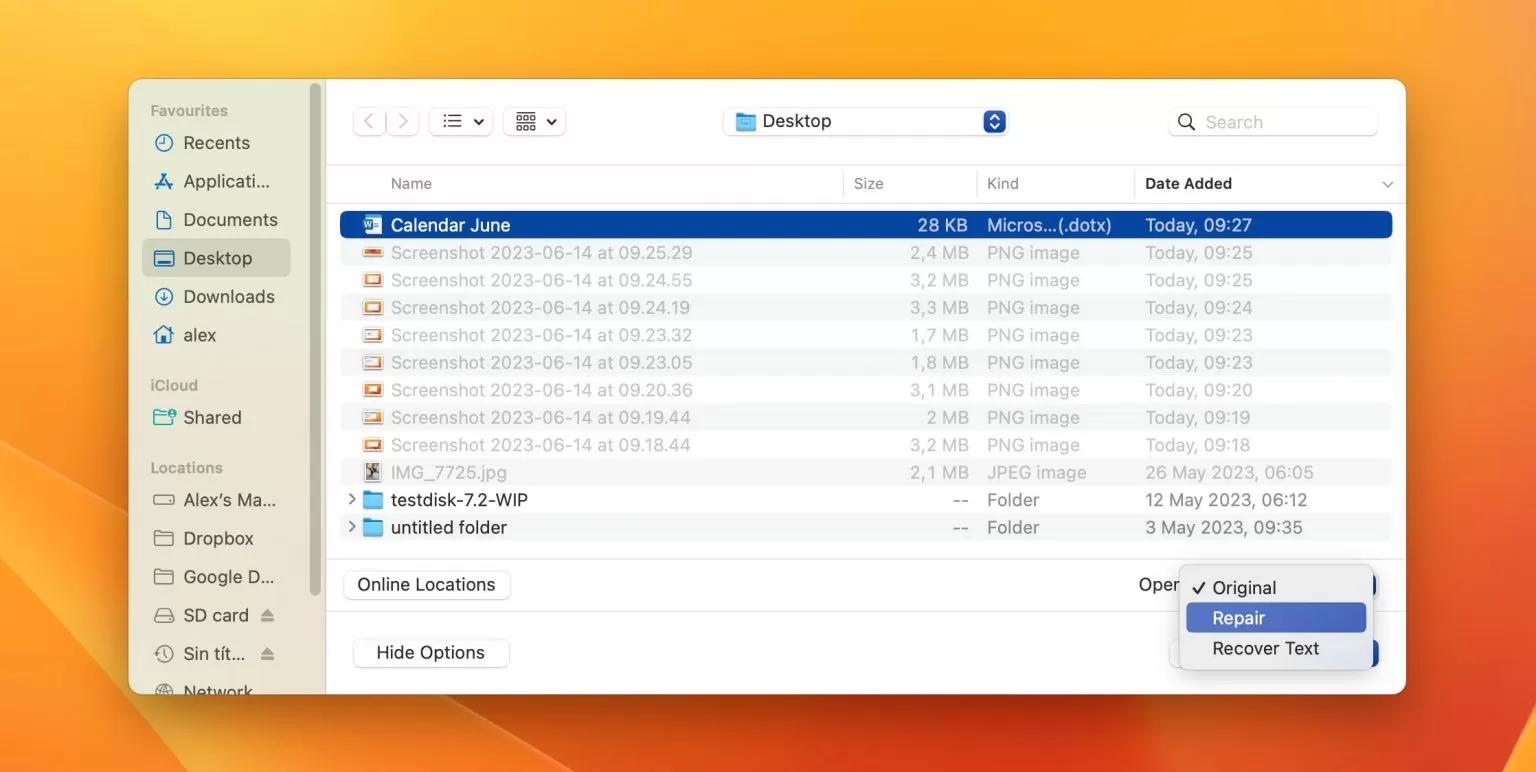
- In Word, click File > Open.
- Select the damaged file from the dialog box.
- Click the arrow on the Open button to reveal the submenu.
- Choose the Repair or Recover Text option.
![Click Repair or Recover Text option]()
Tips to Help Avoid Losing Important Word Files
Here are a few tips to help you avoid losing Word files. If the files contain important data and are valuable to you, consider taking the necessary steps to protect them from accidental loss:
⏸️ Pause before manually emptying the Trash – Take a moment to review the items you are about to delete. You might be able to easily recover a mistakenly deleted file from the Trash at this stage, rather than relying on data recovery software after the Trash has been emptied.
🛡️ Run Antivirus software – Malware and viruses can cause data loss. Use a reputable antivirus tool and ensure it is always up to date.
🔋 Consider a surge protector – Power spikes and surges can lead to unexpected system crashes that result in data loss. Using a reliable surge protector can help prevent such issues and protect your Word documents.
💾 Turn on AutoRecovery – This Microsoft document provides all the details about the AutoRecovery feature. Enable it to automatically safeguard your Word files.
💎 Configure Guaranteed Recovery – Guaranteed Recovery is a free data protection tool available with the trial version of Disk Drill. It allows you to set up specific files and folders for extra protection against accidental deletion and offers a one-click recovery method.
FAQ’s
What should I do if I accidentally closed a Word document without saving it?
If you accidentally closed a Word document without saving it, you can use the AutoRecovery feature built into Microsoft Word. Open a Finder window, search for ‘AutoRecovery,’ and look for files that start with ‘AutoRecovery save of.’ Double-click the file to open it in Word and save it with a new name.
How can I recover a Word document that was accidentally deleted and is no longer in the Trash?
If the deleted Word document is no longer in the Trash, you can try recovering it using Time Machine if you have backups enabled. Connect your Time Machine backup device, open Finder, go to the folder where the file was last saved, and use Time Machine to restore the document. Alternatively, you can use data recovery software like Disk Drill.
My Word document disappeared because Word crashed. How can I get it back?
If Word crashed and you didn’t save your document, check the AutoRecovery feature in Word by searching for ‘AutoRecovery’ in Finder. You can also look in the Mac Temp folder by using Terminal to navigate to $TMPDIR and search for your document.
What steps should I take if AutoRecovery was not enabled and I need to recover an unsaved Word document?
If AutoRecovery was not enabled, try searching the Mac Temp folder by opening Terminal and typing cd $TMPDIR followed by ls. You can also attempt to recover the file from within the Word app by looking for any available recovery options.
How can I restore an earlier version of a Word document on my Mac?
To restore an earlier version of a Word document, open the most recent version of the file in Word, go to File > Browse Version History, and select the version you wish to restore. Click Restore to return the file to its earlier state.
How do I repair a corrupted Word document that I can’t open?
To repair a corrupted Word document, open Word and go to File > Open. Select the damaged file, click the arrow on the Open button, and choose the Repair or Recover Text option from the submenu.
Conclusion
Recovering lost or unsaved Word documents on a Mac can be manageable with the right approach. Using tools like AutoRecovery, Time Machine backups, and data recovery software can help you retrieve important files. By taking preventive measures and following the recovery steps outlined, you can minimize the risk of data loss and keep your documents safe.
ad
Comments are closed.