Many of us have more than one Google Account and it could be a tiring experience trying to log out of one account and login to another one every single time. You have perhaps designated these accounts for our different requirements like one could be for personal use, another one strictly for work, etc. So, you feel the need for the flexibility to access all our accounts without the tiresome logging in and out of the account. In this article, we learn about how to add second google account on Android smartphone.
How to add a second Google account to your Android phone
- Launch Settings from your Home screen, the app drawer, or the Notification Shade.
2. Swipe up in the Settings menu to scroll down.
3. Tap Accounts.
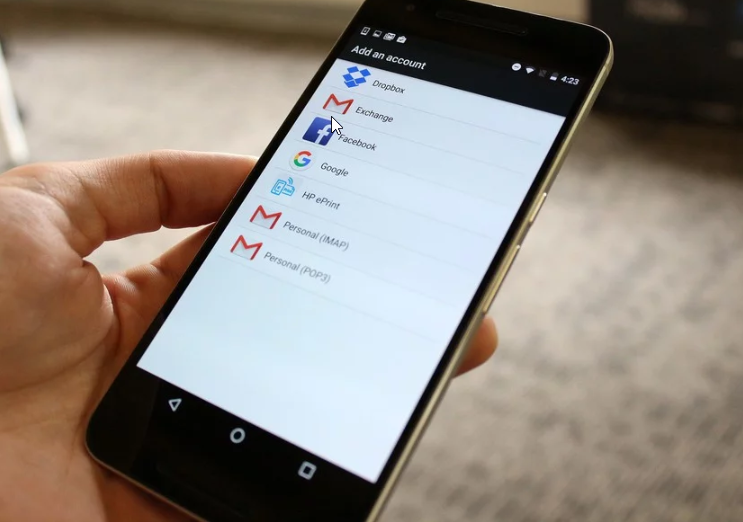
4. Tap Add Account.
5. Tap Google.
6. Type in your email address in the provided field. You can also create a new account to be added.
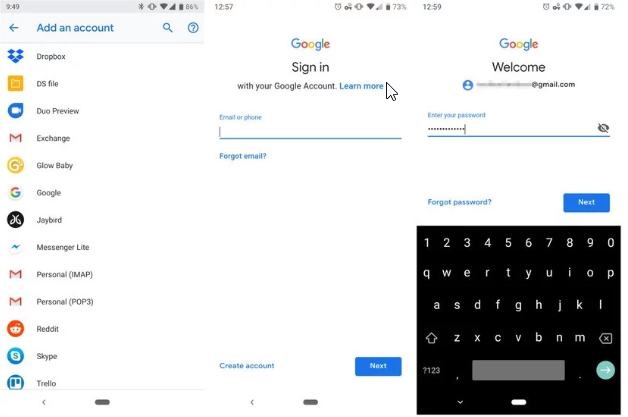 7. Tap Next.
8. Type your password.
9. Tap Next.
How to remove a Second Google account from your Android phone
- Swipe down from the top of the Home screen.
- Tap the Settings button. It looks like a gear.
- Swipe up in the Settings menu to scroll down.
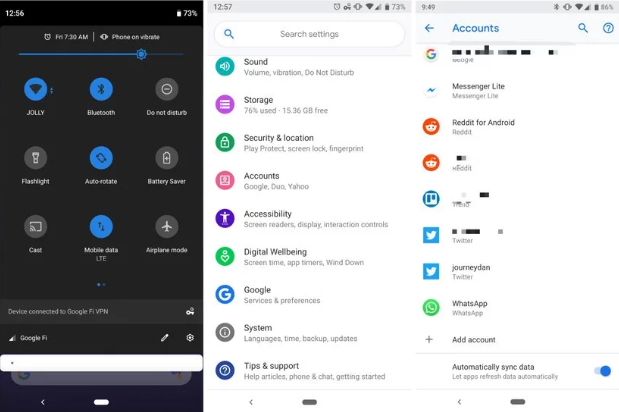
- Tap Accounts.
- Tap Google.
- Tap the Google account you’d like to remove.
- Tap Remove account.
- Tap Remove account to confirm the account removal.
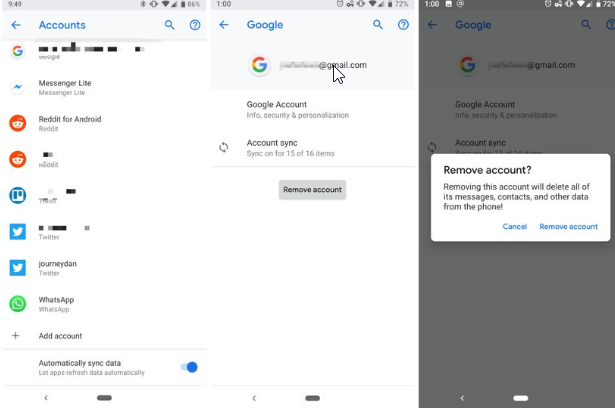
When you remove any Google account, all the data associated with it is deleted from your phone. Your account isn’t deleted from the cloud, so things like contacts or paid apps can be retrieved if you re-add the account or use the account on another device, but all your local data (like messages or app settings) is gone forever. You’ll see a warning about data deletion before you finish the process.
How to add an account on Samsung phones
Because Samsung and other manufacturers tend to change the Android user interface, the exact steps above won’t always apply. Here’s how you add a second Google account on Samsung phones.
- Launch Settings from your Home screen, the app drawer, or the Notification Shade.
- Swipe up in the Settings menu to scroll down.
- Tap Cloud and accounts.
- Tap Accounts.
- Tap Add Account.

- Tap Google.
- Type in your email address in the provided field. You can also create a new account to be added.
- Tap Next.
- Type your password.
- Tap Next.
If you are getting the problem to add a secondary account in your smartphone than google assistant helps you.
