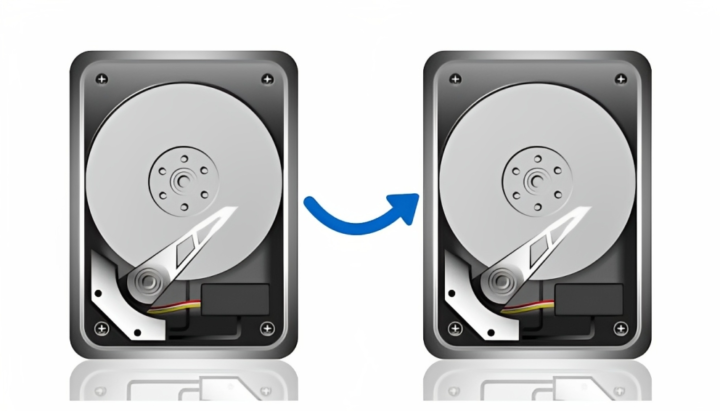
Cloning a hard drive brings great advantages, making it a convenient method for making the most of your storage. It lets you make an exact copy of your hard drive, which is handy for backing up or moving data. Thus, this guide is helpful for you to understand the necessity of hard drive clone and offer you an efficient method to clone a hard drive.
Why you should clone your hard drive?
Upgrade your hard drive
When it comes to upgrading your hard drive, a significant motivation often stems from running out of storage space. If you find yourself in this situation, opting to clone your existing hard drive onto a new one proves to be a strategic decision. This approach empowers you to expand your PC’s storage capacity while safeguarding all your previous files.
Enhancing PC performance
For all users, and particularly those who subject their machines to demanding tasks – such as gamers, video editors, engineers, and creative professionals – optimizing PC performance stands as a paramount objective. If speed and efficiency rank high on your priority list, embracing the employment of a solid-state drive (SSD) is a prudent choice. Alternatively, you might opt to exchange your existing SSD for one boasting greater storage capacity. In either scenario, effecting a clone of your initial hard drive onto the fresh one emerges as a brilliant strategy for preserving all your valuable data.
What to do before cloning your hard drive?
Safeguard vital data via full backup
Prior to initiating the cloning procedure, it’s imperative to ensure the protection of essential data residing on your current drive. If there are particularly critical files you intend to clone, it’s advisable to perform a backup onto an external drive beforehand. This step holds utmost significance, as the cloning operation involves the complete overwriting of data on your original hard drive. Safeguarding against potential mishaps, this preemptive measure mitigates the risk of any inadvertent loss.
Verify available storage on destination drive
Prior to commencing the cloning endeavor, it’s imperative to conduct a thorough evaluation of the storage capacity on the intended destination hard drive. Ensuring adequate space is crucial to forestalling potential storage-related complications, a scenario particularly pertinent during transitions from a traditional HDD to a swifter SSD. Suppose the original drive boasts a capacious 1TB storage on an HDD; in such a case, it’s necessary to make sure that your new SSD offers comparable capacity. Overloading the cloning process with an excessive data load holds the potential to trigger failure, leading to the unintended overwriting of your cherished data. (Fortunately, adhering to our counsel from Step 1 by diligently backing up your data provides a safety net against such contingencies.)
Find a suitable way to clone hard drive
A good tool can help you save a lot of effort. How? It is professional and reliable when performing the whole cloning process. Thus, the thing you need to do is to choose a good disk cloning software. I recommend AOMEI Backupper.
How to clone a hard drive
As we all know, there’s no built-in utility to clone hard drive in Windows. Hence, you need to choose a well-functioning cloning software. For example, AOMEI Backupper. This software is not only professional backup and restore software, but also powerful cloning software. It is one of the best external hard drive cloning software.
- Flexible cloning options: you are available to clone disk, partition and system. You can enjoy the last on in its advanced version.
- Intelligent clone: notably, this software is intelligent for it allows you to clone only used sectors from one drive to another while skipping the bad sectors.
- SSD alignment: 4k technology is used to improve the general performance of SSD disk.
If you have not used this software, please download it and have a try. Here is the full tutorial to answer how to clone hard drive via this software.
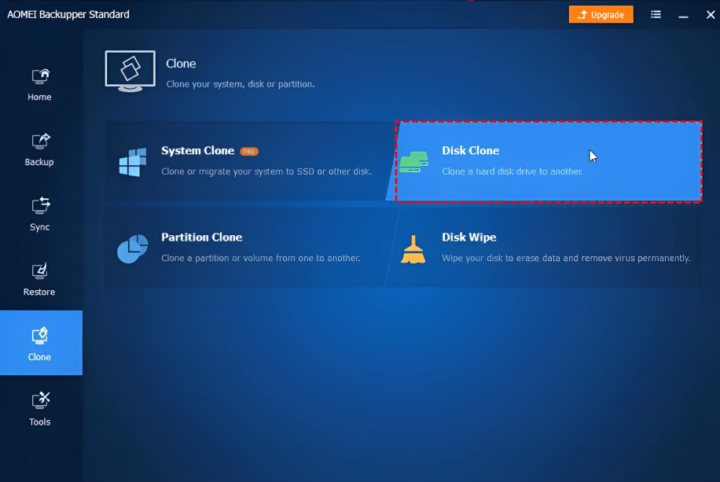
Step 1. Choose Clone at the left-tab menu and then choose Disk Clone.
Step 2. Then you can choose the source disk—the original hard drive that decide to clone and then choose Next.
Step 3. After that, you need to choose the destination disk and then click Next to continue.
Step 4. Then you can choose Start Clone to initiate the cloning process. Then wait patiently, and choose Finish afterward.
Conclusion
I believe you know the way to clone your hard drive. However, before cloning hard drive, you should have done some preparations, like making a backup of your destination hard drive, and ascertaining if there’s an efficient location on it. Also, you need to choose reliable and professional cloning software, AOMEI Backupper is totally free and versatile. You can have a try when you decide to clone the hard drive.